

10 Βήματα για περιποίηση νυχιών στο σπίτι
Δεν χρειάζεται να είσαι επαγγελματίας για να πετύχεις περιποίηση νυχιών στο σπίτι. Αρκεί μόνο να ακολουθήσεις τα παρακάτω βήματα και θα έχεις όμορφα και περιποιημένα νύχια, από την άνεση του σπιτιού σου.
#1 Προετοιμασία
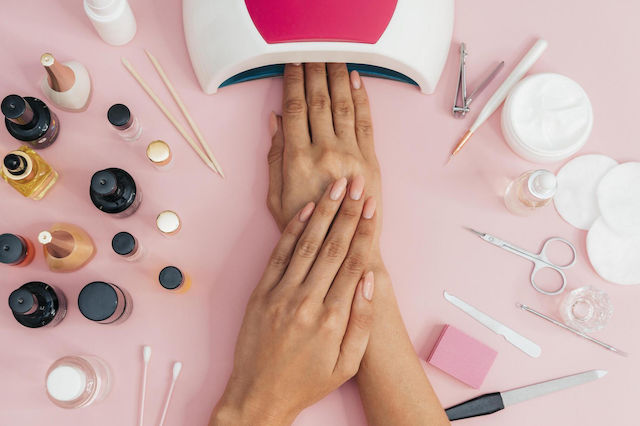
Πριν ξεκινήσεις την περιποίηση, θα πρέπει να σιγουρευτείς πως έχεις κοντά σου όλα όσα χρειάζεσαι. Βάλε σε σειρά τον εξοπλισμό που θα χρειαστείς, ώστε να αποφύγεις τις περιττές κινήσεις και να προστατέψεις τα νύχια σου.
#2 Ξέβαψε τα νύχια σου
Για να έχεις επαγγελματικό αποτέλεσμα, θα πρέπει πρώτα να ξεβάψεις πολύ σχολαστικά τα νύχια σου και να απομακρύνεις όλα τα υπολείμματα από παλαιότερη βαφή. Για απλό βερνίκι νυχιών, θα χρειαστείς ένα απλό ασετόν.
Αν το μανό είναι ημιμόνιμο, τότε δοκίμασε αυτό το κόλπο. Πότισε κομμάτια βαμβάκι με καθαρό ασετόν και τοποθέτησε τα πάνω στα νύχια σου. Κάλυψε τα με τις ειδικές θήκες αφαίρεσης ημιμόνιμου και άφησε τα για 10 με 15 λεπτά. Έπειτα, αφαίρεσε τις θήκες και το βαμβάκι και απομάκρυνε τα υπολείμματα μανό με ένα εργαλείο αφαίρεσης ημιμόνιμου.
Για gel ή ακρυλικό, δοκίμασε να αφαιρέσεις την παλιά στρώση με ένα τροχό νυχιών. Τρίψε σιγά, σιγά με τον τροχό τα νύχια σου, μέχρι να φύγει εντελώς η στρώση του gel.
-
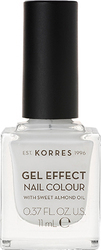 Βερνίκια νυχιών
-
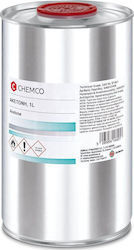 Ξεβαφτικά Νυχιών
-
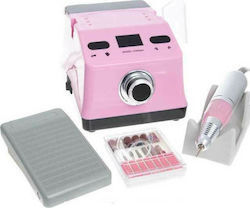 Τροχός Νυχιών
#3 Δώσε σχήμα και μήκος στα νύχια σου
Με μία λίμα ή με τον τροχό, μπορείς να λιμάρεις τα νύχια σου και να τους δώσεις το μήκος που θέλεις. Επίσης, με τον ίδιο τρόπο μπορείς να δώσεις σχήμα στα νύχια σου όπως τετράγωνα, στρογγυλά, μπαλαρίνα ή almond.
Για να μη ρισκάρεις να χαλάσεις το σχήμα και να έχεις ομοιόμορφο αποτέλεσμα σε όλα τα νύχια, σου προτείνω να τα αφήσεις λίγο πιο μακριά από ότι συνήθως, ώστε να μπορέσεις να διορθώσεις τυχόν λάθη.
#4 Spa νυχιών
Ακόμη και τα νύχια σου αξίζουν τη δική τους περιποίηση spa. Ξεκίνα με το να τα μουλιάσεις για 5 λεπτά σε ένα μπολ με χλιαρό νερό και κάποιο δυναμωτικό έλαιο και έπειτα, σκούπισε τα και κάνε απαλό μασάζ στις άκρες που συνήθως βγαίνουν παρανυχίδες.
Σε αυτό το στάδιο, το δέρμα γύρω από τα νύχια θα πρέπει να έχει μαλακώσει αρκετά, ώστε να μπορέσεις με ευκολία να το καθαρίσεις από πετσάκια και παρανυχίδες.
#5 Απομάκρυνση νεκρών κυττάρων, πετσάκια, και παρανυχίδες
Για να πετύχεις την τέλεια περιποίηση νυχιών στο σπίτι, θα πρέπει να λάβεις ολοκληρωτική περιποίηση άκρων. Αυτό θα πει πως πρέπει να καθαρίσεις το δέρμα γύρω από τα νύχια, από νεκρά κύτταρα, πετσάκια, και παρανυχίδες.
Για τα νεκρά κύτταρα στις φτέρνες των ποδιών, δοκίμασε να λιμάρεις την περιοχή με μία ηλεκτρική λίμα ποδιών ή με ελαφρόπετρα.
Για τα πετσάκια και τις παρανυχίδες θα χρειαστείς μερικά εργαλεία περιποίησης νυχιών. Αρχικά πάρε το σπρωχτηράκι σου και σπρώξε τα πετσάκια προς τα πίσω. Αυτή η κίνηση θα διαχωρήσει αυτομάτως τα πετσάκια που πρέπει να αφαιρεθούν με ένα πενσάκι, από αυτά που είναι υγιεί. Με το πενσάκι σου ή με ένα trimmer για πετσάκια, κόψε πολύ προσεκτικά τα πετσάκια που προεξέχουν. Επανέλαβε για όλα τα νύχια σε χέρια και σε πόδια.
-
 Λίμες Νυχιών
-
 Ηλεκτρικές Λίμες Ποδιών
-
 Πενσάκια Νυχιών & Επωνυχίων

#6 Λείανση της επιφάνειας των νυχιών
Πάρε ένα buffer ή ένα τροχό νυχιών με κεφαλή buffer και ξεκίνα να τρίβεις την επιφάνεια των νυχιών για να είναι λεία και ομοιόμορφα. Προσεκτικά και με απαλές κινήσεις, προσπάθησε να καλύψεις όλη την επιφάνεια του νυχιού. Απέφυγε να τρίψεις κατά λάθος τα πετσάκια γύρω από το νύχι γιατί μπορεί να τα πληγώσεις.
#7 Καθάρισε τα νύχια σου
Για να προχωρήσεις με το βάψιμο των νυχιών σου θα πρέπει πρώτα να τα καθαρίσεις και να τα στεγνώσεις από υπολείμματα νερού και σκόνης. Με ένα βουρτσάκι ξεσκόνησε τα νύχια σου από τη χρήση του buffer και με μία καθαρή πετσέτα, καθάρισε και στέγνωσε τα προσεκτικά.
Αν νιώθεις τα νύχια σου λιπαρά, πέρασε τα μία φορά με ασετόν και βαμβάκι.
#8 Βάψε τα νύχια σου
Αφού έχεις ολοκληρώσει όλα τα παραπάνω βήματα, ήρθε η ώρα να βάψεις τα νύχια σου. Ξεκίνα απλώνοντας το base coat (βάση) και περίμενε να στεγνώσει. Αν χρησιμοποιείς ημιμόνιμο, ψήσε στο φουρνάκι όλα τα νύχια μαζί για δύο λεπτά.
Αφού είναι έτοιμα με τη βάση, πάρε το μανό που σου αρέσει, είτε ημιμόνιμο, είτε απλό και ξεκίνα να βάφεις με απαλές και σταθερές κινήσεις τα νύχια σου. Πρόσεξε να χρησιμοποιείς μικρή ποσότητα μανό τη φορά για να αποφύγεις τρεξίματα και φουσκάλες. Για ημιμόνιμο μανό, θα πρέπει να ψήνεις κάθε φορά για δύο λεπτά τα νύχια σου, στο φουρνάκι.
ίσως χρειαστεί να επαναλάβεις τη διαδικασία της βαφής με μανό 2-3 φορές, ανάλογα με το πόσο έντονο θες να είναι το χρώμα στα νύχια σου. Αν ξεφύγει το χέρι σου και βάψεις κατά λάθος το δέρμα γύρω από το νύχι, φρόντισε να το σκουπίσεις πριν στεγνώσει, για φύγει εύκολα.
-
 Buffer
-
 Base Coat
-
 Ημιμόνιμα Βερνίκια Νυχιών
-
 Φουρνάκια Νυχιών


#9 Διακόσμηση νυχιών και top coat
Όταν τελειώσεις με τις στρώσεις μανό που θες για να πετύχεις το ιδανικό χρώμα, μπορείς να ξεκινήσεις να διακοσμείς τα νύχια σου με διάφορα είδη διακόσμησης νυχιών. Επέλεξε ανάμεσα σε στρας, glitter, σκόνες διακόσμησης, ταινίες ή ακόμη και σχέδια με πινέλο ή στάμπες, για να τα διακοσμήσεις. Απλά εφάρμοσε μία λεπτή στρώση μανό ή χρησιμοποίησε ειδική κόλλα για νύχια και ξεκίνα τα να διακοσμείς όπως σου αρέσει.
Θυμήσου στο τέλος να περάσεις τα νύχια σου με top coat για να σταθεροποιήσεις την διακόσμηση και για να παρατείνεις την ακεραιότητα τους.
#10 Ενυδάτωσε το δέρμα γύρω από τα άκρα σου
Τόσο τα νύχια, όσο και το δέρμα γύρω από αυτά χρειάζονται ενυδάτωση μετά από τη διαδικασία της περιποίησης. Ειδικά, αν χρησιμοποιείς φουρνάκι για ημιμόνιμο μανό, η διαδικασία του ψησίματος μπορεί να αφυδατώσει το δέρμα γύρω από τα νύχια.
Φρόντισε να απλώνεις ειδικό λάδι για μανικιούρ-πεντικιούρ, γύρω από τα νύχια στα πετσάκια και να κάνεις μασάζ στην περιοχή, μετά από κάθε περιποίηση νυχιών στο σπίτι.
Αυτό ήταν. Αποφοίτησες με επιτυχία στο μάθημα της περιποίησης νυχιών στο σπίτι, χάρη σε αυτόν τον οδηγό. Θα δεις πως, όσο περισσότερο εξασκήσε, τόσο καλύτερη θα γίνεσαι. Καλή επιτυχία!
-
 Είδη Διακόσμησης Νυχιών
-
 Κόλλες Νυχιών
-
 Top Coat
-
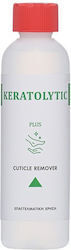 Λοσιόν Μανικιούρ-Πεντικιούρ


Σχετικά Άρθρα
Πώς να Φτιάξεις τα Νύχια σου στο Σπίτι!

Επίλεξε την κατάλληλη πρέσα μαλλιών για σένα!

Οι καλύτερες πρέσες μαλλιών της αγοράς
Άφησε πρώτος το σχόλιό σου!