Im Vergleich zum Ender 3 und Ender 3 Pro bietet das V2-Design den Benutzern ein sofort einsatzbereites Erlebnis und Upgrades, die auf Geräuschlosigkeit ausgerichtet sind (leisere 3D-Drucker).

Τι διάσταση του filament θέλει;
Versandkosten und Liefergeschwindigkeit werden basierend auf dem Lieferort berechnet.


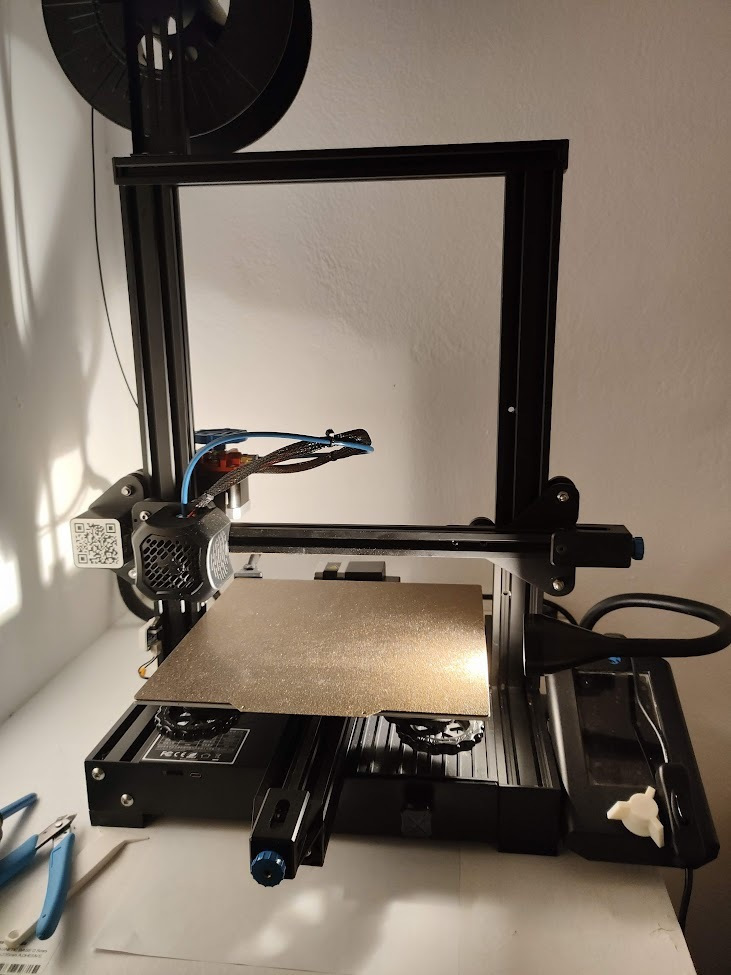
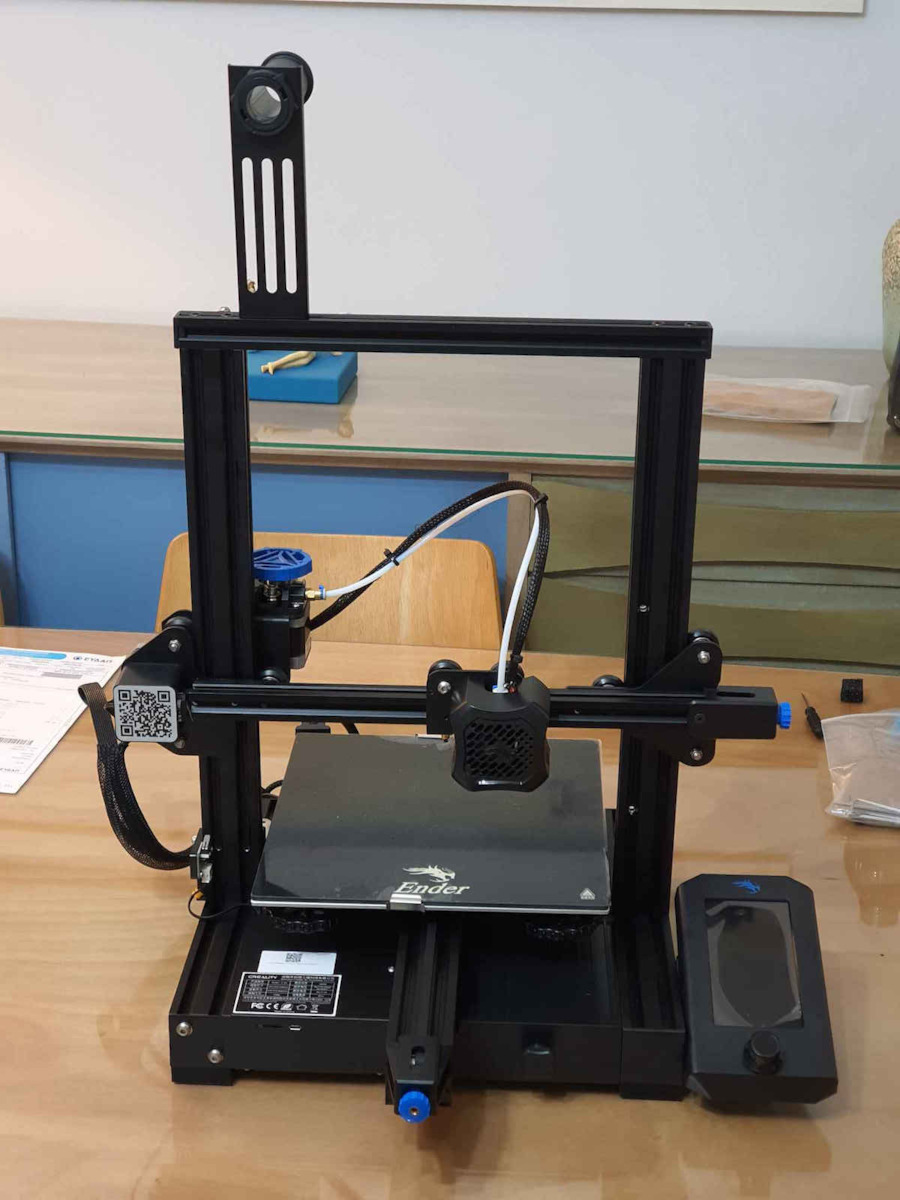
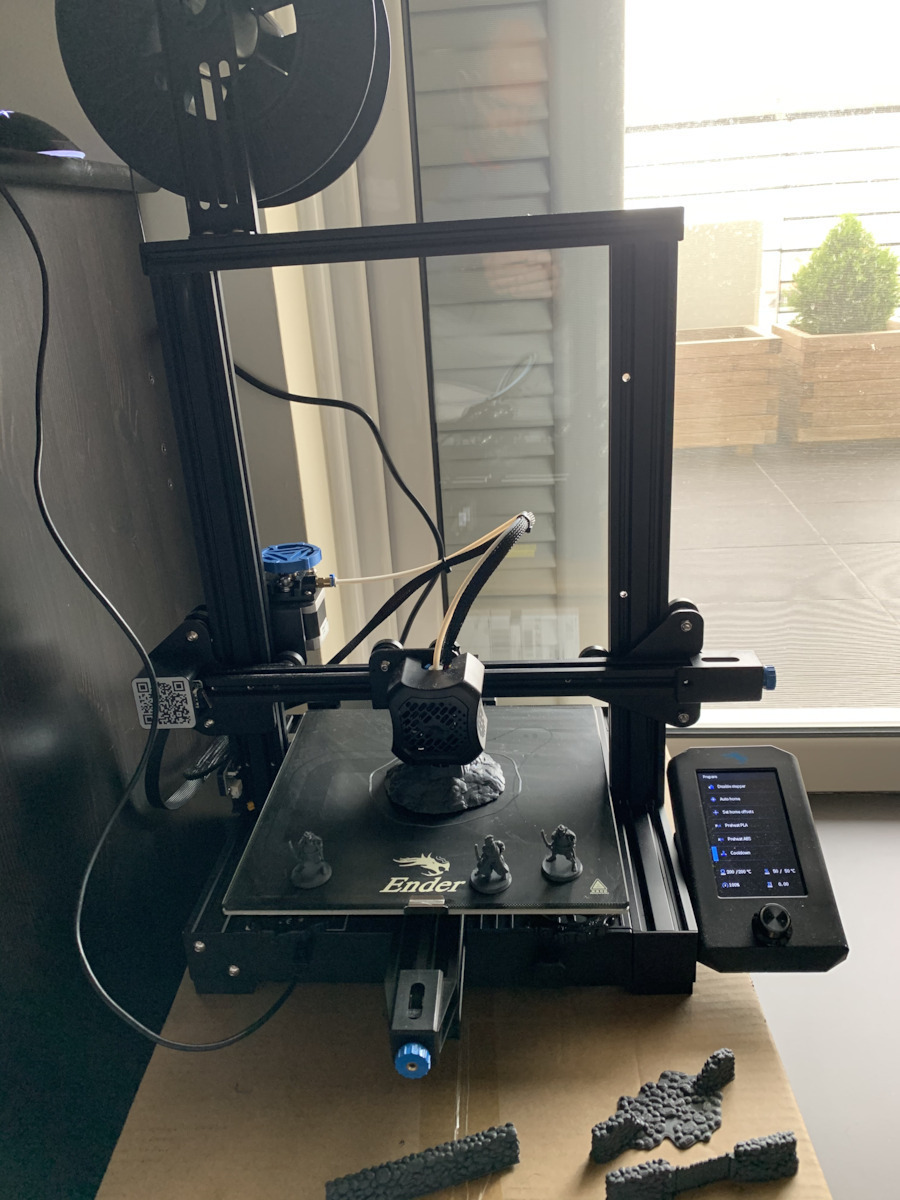
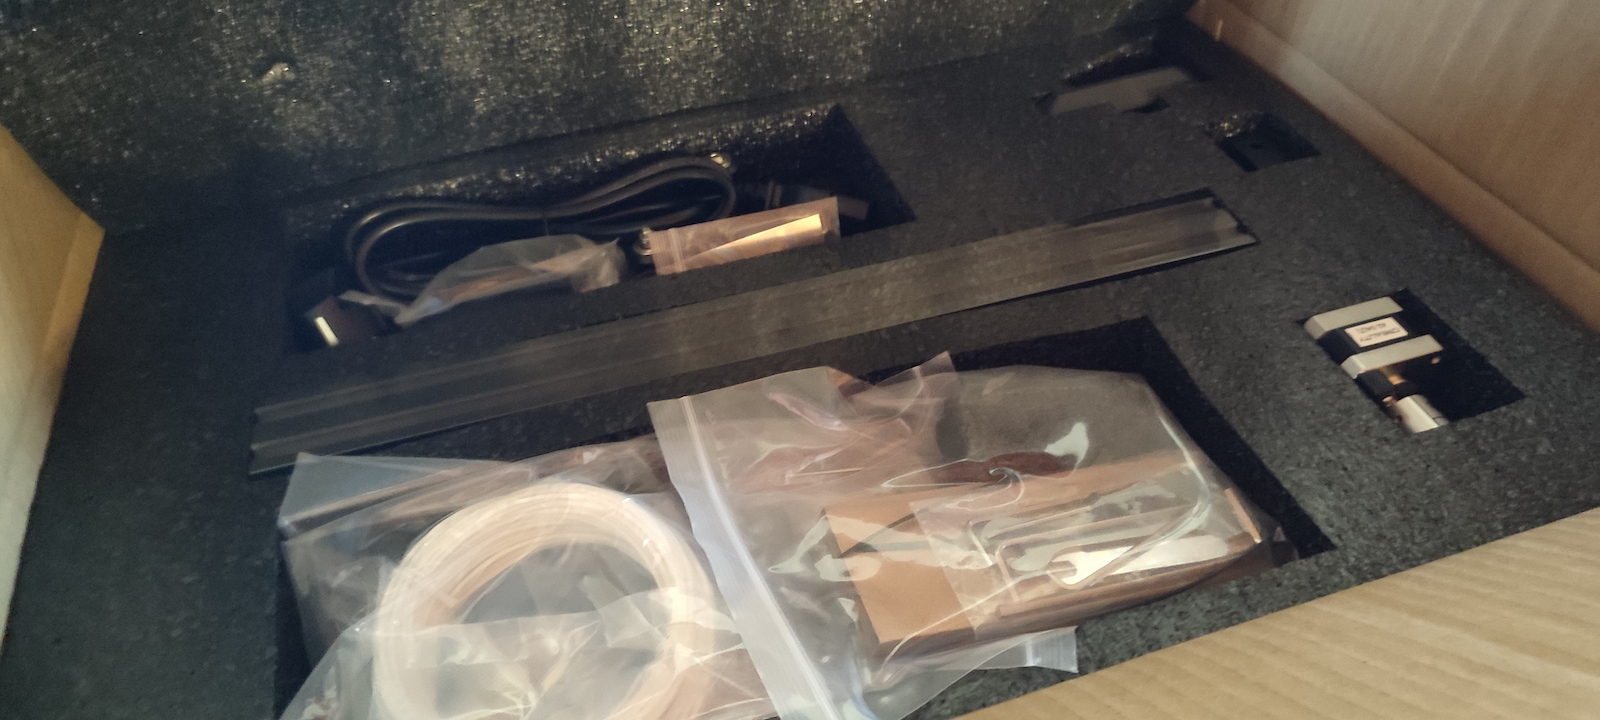
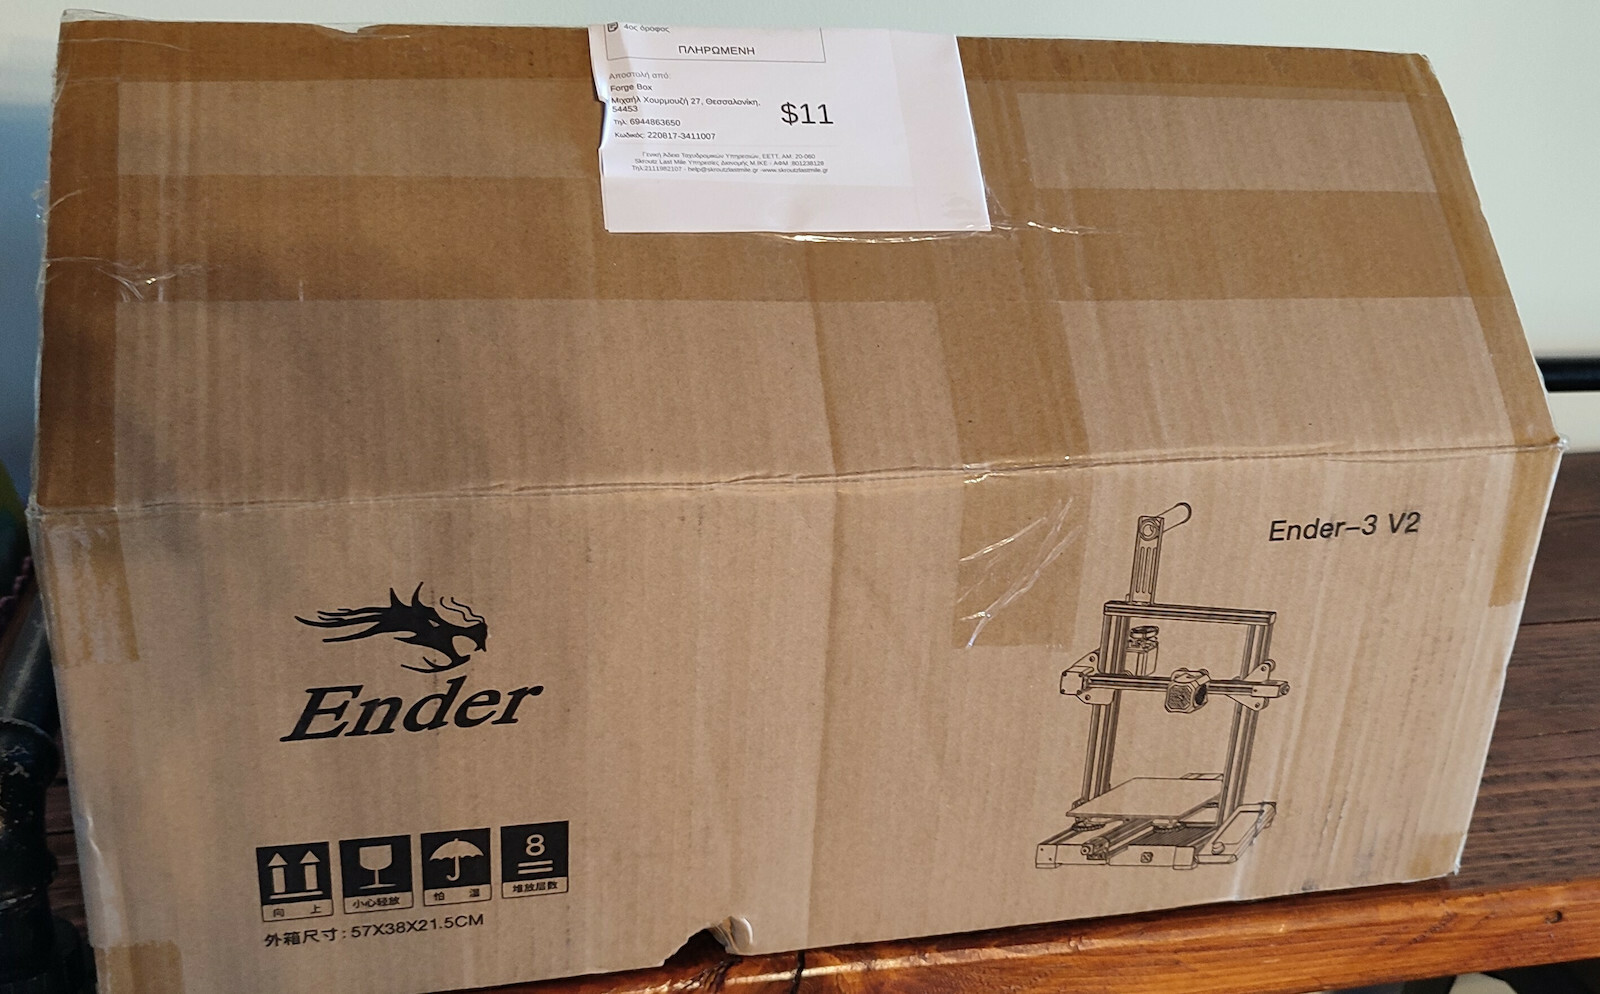
Ein DIY-3D-Drucker, der Ihnen die Möglichkeit gibt, ihn selbst zusammenzubauen und den gesamten Prozess von Anfang an ohne Einschränkungen zu erleben. Mit dem Ender 3 war 3D-Druck noch nie so...
Ein DIY-3D-Drucker, der Ihnen die Möglichkeit gibt, ihn selbst zusammenzubauen und den gesamten Prozess von Anfang an ohne Einschränkungen zu erleben. Mit dem Ender 3 war 3D-Druck noch nie so erschwinglich, präzise und unterhaltsam.
Merkmale
Ein DIY-3D-Drucker, der Ihnen die Möglichkeit gibt, ihn selbst zusammenzubauen und den gesamten Prozess von Anfang an ohne Einschränkungen zu erleben. Mit dem Ender 3 war 3D-Druck noch nie so erschwinglich, präzise und unterhaltsam.
Im Vergleich zum Ender 3 und Ender 3 Pro bietet das V2-Design den Benutzern ein sofort einsatzbereites Erlebnis und Upgrades, die auf Geräuschlosigkeit ausgerichtet sind (leisere 3D-Drucker).
Mit einem 4,3-Zoll-Farbdisplay und einer neu gestalteten Benutzeroberfläche, die Benutzerfreundlichkeit in den Vordergrund stellt, ist der Ender-3 V2 die ideale Wahl für Anfänger.
Die vorinstallierte Spannung des X- und Y-Riemens erleichtert es Ihnen, die Druckqualität Ihrer Maschine auf höchstem Niveau zu halten. Passen Sie die Riemenspannung einfach an, um eine präzise Leistung zu gewährleisten.
Es verfügt über eine eingebaute Schublade zur Aufbewahrung und einfachen Zugriff auf die wesentlichen Werkzeuge und Zubehörteile eines 3D-Druckers.
Spezifikationen werden von offiziellen Hersteller-Websites gesammelt. Bitte überprüfen Sie die Spezifikationen, bevor Sie Ihren endgültigen Kauf tätigen. Wenn Sie ein Problem bemerken, können Sie melden Sie es hier

Verifizierter Kauf
Loipon san proto printer ist eine gute Wahl.
Der Aufbau ist relativ einfach, wenn deine Hände ein wenig geschickt sind und du schon einmal etwas in deinem Leben gesehen hast.
Seine kleinen Themen hat er hier und da, wenn du ihn 24/7 laufen hast und druckst (was natürlich sein sollte), aber es hilft dir dabei, den Drucker zu lernen und eine Vorstellung für den nächsten zu bekommen, den du kaufen wirst. Ich habe danach auf das P1S gewechselt.
Loipon san proto printer einai mia kalh arxh.
To xtisimo einai sxetika eukolo ean ta xeria sou pianoun ligo kai exeis vidosei kati sthn zwh sou.
ta thematakia tou ta exei pou kai pou otan to exeis anameno 24/7 kai ektiponeis (opos tha eprepe vevaia) alla se voithaei auto na matheis to printer kai na exeis mia gnosei gia to epomeno pou tha pareis. Egw meta apo ayto allaksa sto P1S.
Der Drucker funktioniert für seinen Preis sehr gut, das einzige Problem, das ich hatte, war das Nivellieren des Bettes. Für diejenigen, die ihn erwerben, achten Sie während der Montage darauf, dass sich die Räder ohne Druck drehen. Wenn sie sich nicht relativ leicht drehen, wird die Achse eine Neigung nach rechts oder links haben (meistens nach rechts). Das beste Upgrade, das ich nach 3 Monaten Nutzung gemacht habe, ist die Installation eines CR-Touch und Silikonpads anstelle von Federn. Es hilft wirklich sehr. Zusammenfassend kann ich ihn für eine Einführung in die Welt des 3D-Drucks sehr empfehlen.
Ο εκτυπωτής για τα χρήματα του δουλεύει πολύ καλά στο μόνο που με δυσκόλεψε είναι στο"ισιωμα" του κρεβατιού(bed levelling),όσοι τον αποκτήσετε δώστε μεγάλη σημασία κατά την συναρμολόγηση στα ροδακια να γυρίζουν χωρίς πίεση,αν δεν γυριζουν σχετικά άνετα θα έχει κλίση ο άξονας προς τα δεξια η αριστερά(κυρίως δεξιά),η καλύτερη αναβάθμιση που έκανα μετά από 3 μήνες χρήσης είναι η τοποθέτηση cr touch και σιλικονακια αντί για ελατήρια,πραγματικά βοηθάει πάρα πολύ,εν κατακλείδι για εισαγωγή στον χώρο του 3d printing προτείνετε με κλειστά μάτια.

Sehr gutes Produkt, etwas Lärm mit den Lüftern, aber insgesamt gute Ergebnisse.
Very good product, a bit of noise with the fans but overall good results.
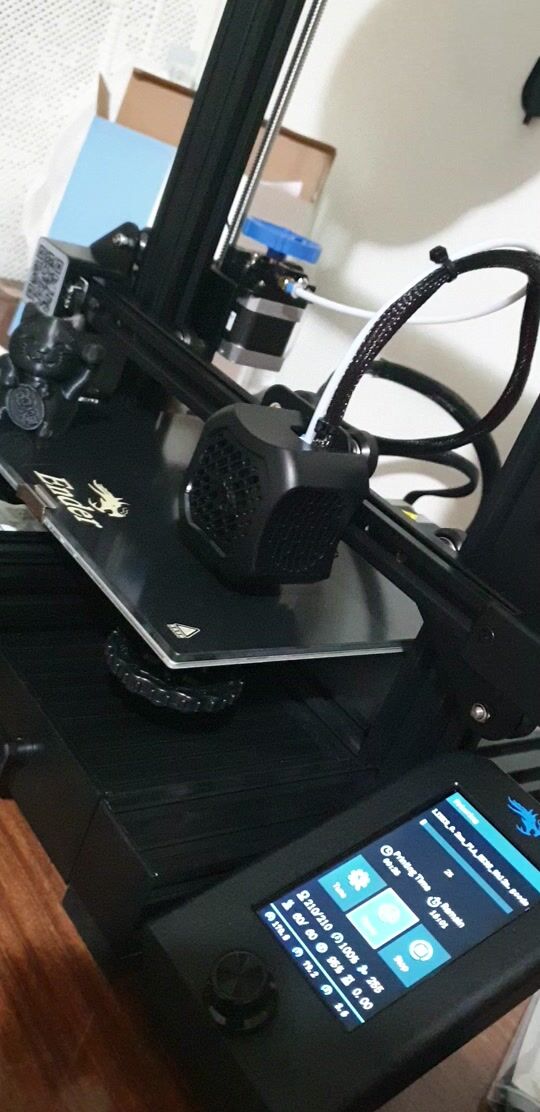


Was den Drucker betrifft, habe ich nichts Schlechtes zu sagen. Hervorragende Druckqualität mit minimalen Problemen nach 2 Monaten häufiger Nutzung, die alle auf eine schlechte Ausrichtung der Basis zurückzuführen waren. Hervorragender Drucker für jemanden ohne vorherige Erfahrung auf diesem Gebiet
Όσο αναφορά τον εκτυπωτή δεν έχω κάτι κακό να πω. Άριστη ποιότητα εκτύπωσης με ελάχιστα προβληματα μετά από 2 και μήνες συχνής χρήστης, εκ των οποίων όλα οφείλονταν σε κακή ευθυγράμμιση της βάσης. Άριστος εκτυπωτής για κάποιον με μηδενική προηγούμενη εμπειρία στον τομέα
Guter Drucker, aber wenn Sie PETG drucken möchten, müssen Sie definitiv den Hot-End auf ein vollständig metallisches Modell aufrüsten, da sich das Teflon-Bowdenrohr sonst auflöst und giftige Gase freisetzt.
Καλος εκτυπωτης αλλα αμα θες να εκτυπωσεις petg θα χρειαστεις οπωσδηποτε αναβαθμιση του hot end σε all metal διοτι το τεφλον bowdern tube πυρολυεται με αποτελεσμα την εκφυσηση τοξικων αερίων.
Ich werde schreiben, woran ich mich aus meinen Erfahrungen erinnere, um denen zu helfen, die darüber nachdenken, es als ihren ersten Drucker zu kaufen.
Ein paar Worte über meine Erfahrung:
Als ich es bekam, war ich ein absoluter Anfänger, ich hatte noch nie zuvor einen Drucker gesehen und hatte keine Ahnung, wie er funktionierte. Jetzt sind bereits ein halbes Jahr vergangen, seit ich ihn bekommen habe.
Seien wir ehrlich, egal welchen Drucker man bekommt (besonders zu so einem niedrigen Preis), es erfordert das Lesen (und viele Fehler), um zu verstehen, wie man ihn benutzt.
Zu Beginn habe ich viele Videos auf YouTube angesehen (auf Englisch, es gibt nicht viele auf Griechisch), um eine Vorstellung davon zu bekommen, wie ein 3D-Drucker im Allgemeinen funktioniert. Dann habe ich diesen Drucker ausgewählt und viele Montagevideos von verschiedenen Kanälen angesehen und festgestellt, dass es viele Leute gibt, die es "falsch" machen oder falsche Dinge sagen, also erfordert es Recherche.
Seien Sie vorsichtig mit den Rädern, drücken Sie sie nicht gegen die Kanten des Metalls, da sie Kratzer verursachen können und der Gummi nicht glatt ist, was zu Problemen führen kann.
Bei der Montage müssen Sie Zeit für die Räder aufwenden, damit keines von ihnen zu fest oder zu locker ist. Versuchen Sie, den gleichen Druck auf alle auf dem Metall auszuüben.
Was das Nivellieren des Bettes betrifft, habe ich natürlich viele Videos angesehen, um eine Vorstellung davon zu bekommen, was andere tun und den richtigen Weg zu finden, das Bett zu nivellieren und anhand des Drucks zu erkennen, ob es zu hoch oder zu niedrig positioniert ist.
Achtung: Wenn ein Druckvorgang abgeschlossen ist, VERSUCHEN SIE NICHT, ihn sofort zu entfernen. Sie müssen warten, bis das Bett auf etwa 30 Grad Celsius abgekühlt ist, um den Druck ohne Beeinträchtigung der Nivellierung des Bettes zu entfernen. Wenn die Betttemperatur über 40 Grad liegt, lässt sich der Druck nicht leicht entfernen. Es erfordert ein wenig Geduld und wird nach einer Weile leicht abgehen. Wenn Sie nicht warten, müssen Sie vor jedem Druck das Bett nivellieren. Es lohnt sich nicht.
Über die Software:
Nach einigen Drucken habe ich festgestellt, dass es bessere Softwareoptionen gibt, die aktueller sind und mehr Funktionen und Annehmlichkeiten bieten als die Standardsoftware, die mit dem Drucker geliefert wird. Zunächst habe ich Jyers ausprobiert, das ich etwa 4 Monate lang behalten habe. Es war definitiv besser als die Creality-Firmware, hatte aber einige Probleme, und der Entwickler hat sie selten aktualisiert.
Dann habe ich die Professional Firmware von mriscoc gefunden: https://github.com/mriscoc/Ender3V2S1, die definitiv die beste Option für diesen Drucker ist, obwohl es nicht viele Videos gibt, die sie erklären.
Um eine andere Firmware auf dem Drucker zu installieren, ist es relativ einfach und rückgängig zu machen (wenn Sie die Original-.bin-Datei von Creality finden können). Zunächst müssen Sie die Version Ihres Mainboards herausfinden, entweder 4.2.2 oder 4.2.7. Ich habe 4.2.2. Um herauszufinden, wie Sie dies überprüfen können, schauen Sie sich einige Videos an. Sobald Sie das wissen, laden Sie die entsprechende .bin-Datei von GitHub oder wo auch immer sie verfügbar ist, herunter. Legen Sie sie auf die SD-Karte, stecken Sie die SD-Karte in den Drucker und schalten Sie ihn dann ein. Nach einer Weile sehen Sie, dass er geflasht wird. Entfernen Sie dann die Karte und stecken Sie sie wieder in den PC.
Das war das Upgrade der Firmware des Druckers, aber es ist auch gut, die Firmware des Bildschirms zu aktualisieren, obwohl ich glaube, dass dies mehr für einige Symbole ist, die möglicherweise nicht angezeigt werden. Laden Sie also die Zip-Datei herunter: DWIN_SET für diese spezifische Firmware, entpacken Sie sie und werfen Sie den ORDNER weg (der die Dateien enthält) auf die SD-Karte (löschen Sie die vorherige .bin von der SD). Trennen Sie dann das Bildschirmkabel, entfernen Sie es vom Bildschirm, entfernen Sie die Schrauben von der Rückseite und entfernen Sie die Rückwand (es erfordert Kraft). Legen Sie die SD-Karte in den Bildschirm (es hat einen Steckplatz für SD), verbinden Sie den Bildschirm mit dem Kabel und schalten Sie den Drucker ein. Warten Sie, bis der Bildschirm lila wird, warten Sie etwa eine Minute und schalten Sie den Drucker aus. Entfernen Sie die Karte vom Bildschirm und löschen Sie die Dateien, dann sind Sie bereit. Schrauben Sie den Bildschirm wieder fest und setzen Sie ihn an seinen Platz.
Um zur standardmäßigen Creality-Firmware zurückzukehren, machen Sie theoretisch dasselbe, nur mit den Creality-Dateien, von denen ich keine Ahnung habe, wo ich sie finden kann, weil ich nicht zur Original-Firmware zurückkehren werde.
Außerdem muss die installierte Firmware speziell für Ihren Drucker sein. Das heißt, für den Ender 3 V2. Und mit Ihrer Version, 4.2.2 oder 4.2.7, je nachdem, welches Board Sie haben.
Mein Rat ist, zunächst mit der Original-Firmware zu arbeiten und dann eine andere zu installieren, wenn Ihnen diese gefällt.
Über Upgrades:
Ursprünglich hatte ich keine Upgrades gemacht, aber dann musste ich welche machen. Es ist sehr üblich, dass der Kunststoffgriff des Extruders nach einer Weile bricht. Ich habe das Bowden "Extruder Feed Kit MK8 Red - 1.75mm Aluminum" zusammen mit dem "Capricorn XS Series PTFE Bowden Tubing for 1.75mm Filament" installiert.
Achtung, beim Wechseln des Extruders oder der Bowden-Röhre müssen Sie eine E-Schritt-Kalibrierung und eine Durchflussraten-Kalibrierung durchführen. Dazu müssen Sie auf YouTube etwas suchen, aber es ist nicht so schwierig, nur einige Messungen und Berechnungen.
Kürzlich habe ich das Bett aufgerüstet und ein magnetisches Bett installiert, genauer gesagt eine generische "Textured Coated Flexible Steel Plate", sowie die magnetische Oberfläche, die Sie auf den Drucker kleben (meiner Meinung nach sollten Sie das Glas entfernen). Ich habe beides für 26 Euro in einem bekannten Geschäft in Athen gekauft.
Es ist für mich nicht so wichtig, dass es magnetisch ist. Im Wesentlichen wird damit geworben, dass es leicht zu entfernen und zu biegen ist, um den Druck abzulösen. Aber wenn Sie das tun, erfordert es Kraft und beeinträchtigt Ihre Bett-Nivellierung. Also entferne ich es nicht, ich habe es nur für eine bessere Haftung des Materials am Bett (ich habe einen großen Unterschied im Vergleich zum Glas gesehen, das ich oft sehr gut gereinigt habe, damit es haftet).
Verwenden Sie auch keine Klebstoffe, Sprays usw., um das Material am Bett haften zu lassen. Wenn Sie die richtigen Einstellungen und eine ordnungsgemäße Bett-Nivellierung haben, wird es gut haften. Ein Tipp ist, die Geschwindigkeit für die erste Schicht des Drucks im Slicer zu reduzieren. Ich habe sie auf 3 in Cura eingestellt. Und es lohnt sich, es langsam zu machen, weil es die wichtigste Schicht ist.
Schließlich habe ich die Federn unter dem Bett aufgerüstet, zusammen mit den Rädern, die Sie zur Bett-Nivellierung einstellen. Das ist definitiv das erste Upgrade, das man machen sollte. Ich habe diese hier bekommen: [Link zum Produkt].
Über den Slicer:
Ich benutze Cura. Der Slicer wandelt 3D-Dateien wie .stl, .obj usw. in .gcode um, damit der Drucker sie lesen kann. Er gibt Anweisungen, wohin der Drucker den Extruder bewegen wird, wie viel Material er extrudieren wird usw. Während die 3D-Dateien für sich allein vom Drucker nicht verstanden werden können.
Sie benötigen also Cura oder ein ähnliches Programm, und es erfordert auch viel Experimentieren und Lesen.
Über Modelle:
Die 3D-Modelle, die Sie in den Slicer eingeben, können entweder von Ihnen mit CAD-Programmen oder Blender, 3Ds Max usw. erstellt werden, oder Sie können fertige Modelle von Thingiverse, Thangs usw. herunterladen.
Negative des Druckers:
Er hat von sich aus kein Bltouch. Persönlich habe ich keines installiert, weil es mir etwas kompliziert erscheint, aber wenn es von Anfang an dabei wäre, würde es mich nicht stören.
Nach einer Weile müssen Sie den Extruder gegen einen Metall-Extruder aufrüsten, da der Kunststoff-Extruder wahrscheinlich unterwegs brechen wird.
Die Federn müssen, wie ich bereits erwähnt habe, eingestellt werden. Dadurch wird das Bett stabiler und verhindert, dass die Bett-Nivellierung leicht durcheinander gerät.
Update 05/23: Ich habe den BL Touch vor 5 Monaten installiert und er hat meine Probleme gelöst...
Update 09/23: Ich habe gerade den Ender 3 V3 SE (von der europäischen Seite von Creality) erhalten und er ist besser und zum gleichen Preis. Er ist etwa 4-mal schneller, hat aber auch eine bessere Druckqualität, selbst bei diesen Geschwindigkeiten... Und der V2 ist gut, ich werde ihn auf jeden Fall behalten, aber der V3 SE ist einfacher.
Θα γράψω ότι θυμάμαι από αυτά που αντιμετώπισα για να βοηθήσω όσους σκέφτονται να τον αγοράσουν ως πρώτο εκτυπωτή.
Λίγα λόγια για την εμπειρία μου:
Όταν τον πήρα ήμουν τελείως αρχάριος, δεν είχα ξαναδεί εκτυπωτή και δεν είχα ιδέα για το πως λειτουργεί. Τώρα έχεις περάσει μισός χρόνος από τότε που τον πήρα.
Κακά τα ψέματα, όποιον εκτυπωτή και να πάρεις (ειδικά με τόσα λίγα χρήματα) θέλει διάβασμα (και αρκετά λάθη) για να καταλάβεις πως να τον χρησιμοποιείς.
Εγώ αρχικά είδα πολλά βιντεάκια στο youtube (στα αγγλικά, δεν υπάρχουν πολλά στα ελληνικά) για να πάρω μια ιδέα για το πως λειτουργεί γενικά ένας 3D εκτυπωτής. Έπειτα, διάλεξα αυτόν τον εκτυπωτή και είδα πάρα πολλά βιντεάκια περί συναρμολόγησης, από πολλά διαφορετικά κανάλια, και συνειδητοποίησα ότι δεν είναι λίγοι αυτοί που το κάνουν "λάθος" ή λένε λάθος πράγματα, οπότε θέλει ψάξιμο.
Προσοχή στα ροδάκια, μη τα πιέσετε στις άκρες από τα σίδερα, επειδή χαράζονται και το λάστιχο μετά δεν είναι λείο και ίσως έχετε θέμα.
Όταν το συναρμολογήσετε, πρέπει να αφιερώσετε χρόνο στα ροδάκια έτσι ώστε να μην υπάρχει κάποιο ροδάκι που είναι πάρα πολύ σφιχτό, ή κάποιο που είναι πάρα πολύ χαλαρό. Όσο μπορείτε να έχουν την ίδια πίεση όλα πάνω στα σίδερα.
Όσο για το bed leveling, προφανώς και εκεί είδα πολλά βιντεάκια για να έχω μια ιδέα το τι κάνουν οι άλλοι και να βρω ποιος είναι ο πιο σωστός τρόπος να ισιώσεις το "κρεβάτι", και πως να αναγνωρίζεις από την εκτύπωση αν είναι τοποθετημένο πιο κάτω ή πιο πάνω απ'ότι πρέπει.
Προσοχή: όταν τελειώνει μια εκτύπωση, ΜΗΝ προσπαθείτε να την βγάλετε με το που σταματήσει. Πρέπει να περιμένετε μέχρι να κρυώσει το κρεβάτι κάπου στους 30 για να μπορείτε να αφαιρέσετε την εκτύπωση χωρίς να χαλάσετε το bed leveling. Όσο η θερμοκρασία του κρεβατιού είναι 40+, δεν ξεκολλάει εύκολα η εκτύπωση. Θέλει λίγο υπομονή και θα βγει πολύ εύκολα μετά από λίγο. Αν δε περιμένετε θα πρέπει κάθε φορά πριν την εκτύπωση να κάνετε bed leveling. Δεν αξίζει.
Περί λογισμικών:
Μετά από μερικές εκτυπώσεις, κατάλαβα ότι υπάρχουν κάποια καλύτερα λογισμικά, πιο ανανεωμένα, με περισσότερες λειτουργίες και ευκολίες από αυτό με το οποίο έρχεται ως default ο εκτυπωτής, και αρχικά δοκίμασα το Jyers, το οποίο το κράτησα για περίπου 4 μήνες. Ήταν σαφώς καλύτερο από το firmware της Creality όμως είχε κάποια θεματάκια, και ο developer δεν το ανανέωνε σχεδόν ποτέ.
Μετά βρήκα το Professional Firmware του mriscoc: https://github.com/mriscoc/Ender3V2S1 το οποίο είναι σίγουρα ότι καλύτερο υπάρχει για τον συγκεκριμένο εκτυπωτή, αν και δεν υπάρχουν πολλά βιντεάκια που να το εξηγούν.
Για να βάλεις ένα άλλο firmware στον εκτυπωτή, είναι σχετικά εύκολο, και αναστρέψιμο (αν μπορείς να βρεις το αρχικό .bin αρχείο της Creality). Αρχικά πρέπει να μάθεις ποια είναι η έκδοση της κύριας πλακέτας σου. Είτε 4.2.2 είτε 4.2.7. Εγώ έχω την 4.2.2. Για να δεις πως το βλέπουμε δες κάποια βιντεάκια. Αφού το δεις αυτό, κατεβάζεις το αντίστοιχο .bin αρχείο από το github ή οπουδήποτε αλλού το έχουν. Το βάζεις στην SD, βάζεις την SD στον εκτυπωτή και μετά τον ανοίγεις. Θα δεις ότι μετά από λίγο θα περαστεί. Μετά βγάζεις την κάρτα και την βάζεις πάλι στο PC.
Αυτό ήταν για να αναβαθμίσεις το firmware του εκτυπωτή, όμως καλό είναι να αναβαθμίσεις και το firmware της οθόνης, αν και αυτό νομίζω είναι πιο πολύ για κάποια εικονίδια που μπορεί να μην εμφανίζονται. Οπότε κατεβάζεις και το zip: DWIN_SET για τον συγκεκριμένο firmware, τον κάνεις unzip και πετάς τον ΦΑΚΕΛΟ (που περιέχει τα αρχεία) μέσα στην SD (διαγράφεις το προηγούμενο .bin από την SD). Μετά αποσυνδέεις το καλώδιο της οθόνης, βγάζεις στην οθόνη και αφαιρείς τις βίδες από πίσω της και βγάζεις το πίσω καπάκι της (θέλει δύναμη). Τοποθετείς την SD κάρτα μέσα στην οθόνη (έχει μια υποδοχή για SD), συνδέεις την οθόνη με το καλώδιο και ανοίγεις τον εκτυπωτή. Περιμένεις μέχρι η οθόνη να γίνει προτοκαλί, περιμένεις και κανένα λεπτό παραπάνω, και κλείνεις τον εκτυπωτή. Βγάλε την κάρτα απ την οθόνη και διέγραψε τα αρχεία και είσαι έτοιμος. Βίδωσε την οθόνη και βάλτη πάλι στη θέση της.
Για να γυρίσεις πίσω στο default firmware της Creality, θεωρητικά κάνεις ακριβώς το ίδιο, απλά με τα αρχεία της Creality, τα οποία δεν έχω ιδέα από που τα βρίσκεις επειδή δεν πρόκειται να περάσω ξανά το αρχικό firmware.
Επίσης για ότι firmware βάλετε, πρέπει υποχρεωτικά να είναι για τον συγκεκριμένο εκτυπωτή σας. Δηλαδή για Ender 3 V2. Και με την έκδοσή σας, 4.2.2 ή 4.2.7, εξαρτάται τι πλακέτα έχετε.
Η συμβουλή μου είναι να δουλέψετε πρώτα με το αρχικό firmware, και στη πορεία βάλτε άλλο αν σας αρέσει.
Περί αναβαθμίσεων:
Αρχικά εγώ δεν είχα κάνει καμία αναβάθμιση, όμως μετά χρειάστηκα.
Είναι πάρα πολύ συχνό φαινόμενο να σου σπάσει η πλαστική λαβή από το extruder μετά από λίγο.
Εγώ έβαλα τον Bowden "Extruder Feed Kit MK8 Red - 1.75mm Aluminum" μαζί με το "Capricorn XS Series PTFE Bowden Tubing for 1.75mm Filament".
Προσοχή, όταν αλλάζετε extruder ή bowden tube, πρέπει να κάνετε e-step calibration και flow rate calibration. Θέλει ψάξιμο στο youtube αλλά δεν είναι τόσο δύσκολο, απλά λίγο μέτρημα και κάτι υπολογισμούς.
Πρόσφατα αναβάμισα το κρεβάτι και έβαλα μαγνητικό, συγκεκριμένα ένα generic "Textured Coated Flexible Steel Plate", + τη μαγνητική επιφάνεια που κολλάς στον εκτυπωτή (πρέπει να αφαιρέσεις το γυαλί κατά τη γνώμη μου). Τα πήρα και τα δύο με 26 ευρώ από ένα γνωστό κατάστημα στην Αθήνα.
Δεν έχει σημασία τόσο για μένα που είναι μαγνητικό. Στην ουσία το διαφημίζουν ότι μπορείς εύκολα να το αφαιρέσεις και να το λυγίσεις για να ξεκολλήσει η εκτήπωση. Όμως όταν το κάνεις αυτό, θέλει δύναμη και σου χαλάει το bed leveling. Οπότε εγώ δε το βγάζω, και απλά το έχω για πολύ καλύτερη συγκόλληση του υλικού στο κρεβάτι (εγώ είδα μεγάλη διαφορά από το γυαλί, που συχνά καθάριζα πολύ καλά για να κολλάει).
Επίσης μη χρησιμοποιείτε κόλλες, σπρέι κλπ για να κολλήσει καλά το υλικό στο κρεβάτι. Αν έχεις σωστές ρυθμίσεις και σωστό bed leveling, θα κολλήσει μια χαρά. Ένα τιπ είναι να χαμηλώσετε στο slicer την ταχύτητα για το πρώτο layer της εκτύπωσης. Εγώ το έχω στο 3 στο Cura. Και αξίζει να το κάνει αργά, επειδή είναι το πιο σημαντικό layer.
Τέλος, αναβάθμισα τα ελατήρια κάτω από το κρεβάτι, μαζί με τις ροδέλες που κουνάς για το bed leveling. Είναι σίγουρα η πρώτη αναβάθμιση που θα πρέπει να κάνει κανείς. Αυτά πήρα: https://www.skroutz.gr/s/22529679/%CE%A0%CE%B1%CE%BE%CE%B9%CE%BC%CE%AC%CE%B4%CE%B9%CE%B1-Leveling-%CE%B3%CE%B9%CE%B1-Ender-3-%CE%9A%CE%B9%CF%84-HS1855.html
Περί Slicer:
Εγώ χρησιμοποιώ το Cura. Το slicer μετατρέπει 3D αρχεία τύπου .stl, obj κ.α. σε .gcode για να μπορεί να τα διαβάζει ο εκτυπωτής. Είναι οδηγίες για το που ο εκτυπωτής θα μετακινήσει τον extruder, πόσο υλικό θα βγάλει κλπ. Ενώ τα 3D αρχεία δε μπορεί φυσικά να τα καταλάβει από μόνος του.
Οπότε χρειάζεται το Cura ή ένα άλλο πρόγραμμα σαν κ αυτό, και χρειάζεται και αρκετό πειραματισμό και διάβασμα.
Περί μοντέλων:
Τα 3D μοντέλα που θα δώσετε στο slicer, μπορείτε είτε να τα δημιουργήσετε εσείς με CAD προγράμματα ή με Blender, 3Ds Max κλπ, είτε να κατεβάσετε έτοιμα από Thingiverse, Thangs κλπ.
Αρνητικά του εκτυπωτή:
Δεν έχει bltouch από μόνος του. Εγώ προσωπικά δεν έχω βάλει επειδή μου φαίνεται λίγο περίπλοκο, όμως αν το είχε από μόνος του δε θα με χαλούσε.
Χρειάζεται να αναβαθμίσεις τον extruder σε μεταλλικό μετά από λίγο, επειδή λογικά ο πλαστικός θα σου σπάσει στη πορεία.
Χρειάζονται αναβάμιση τα ελατήρια όπως είπα παραπάνω. Έτσι θα είναι πιο σταθερό το κρεβάτι και δε θα χαλάει το bed leveling τόσο εύκολα.
Update 05/23: Έχω βάλει BL touch εδώ και 5 μήνες και μου έλυσε τα χέρια...
Update 09/23: Μόλις παρέλαβα τον Ender 3 V3 SE (από το ευρωπαικό site της creality) και είναι καλύτερος και στα ίδια χρήματα. Είναι περίπου 4 φορές πιο γρήγορος, αλλά και έχει καλύτερη ποιότητα εκτυπώσεων, ακόμα και σε αυτές τις ταχύτητες... Και ο V2 καλός είναι, θα τον κρατήσω εννοείται, απλά ο V3 SE είναι πιο εύκολος.
Unser erster Drucker dieser Art. Mein 12,5 Jahre alter Sohn hat ihn gekauft und hatte überhaupt keine Schwierigkeiten beim Zusammenbau, da er seit 7 Jahren Robotik betreibt und daher darüber Bescheid weiß. Er hat nur einen Fehler gemacht und benötigte technischen Support. Sehr gute Wahl! Wir empfehlen ihn sehr.
Ο 1ος μας εκτυπωτής τέτοιου τύπου.
Τον αγόρασε ο γιος μου 12,5 χρονών, δεν δυσκολεύτηκε καθόλου στη συναρμολόγηση, έχει κάνει 7 χρόνια ρομποτική οπότε έχει γνώσεις πάνω σε αυτό. Έκανε μόνο ένα λάθος και χρειάστηκε τεχνική υποστήριξη. Πολύ καλή επιλογή! Τον συνιστούμε ανεπιφύλακτα.

Erster Drucker! Die Montage fand gestern am ersten Tag statt (relativ einfach, mit Hilfe von Videos von YouTube für einige kleine, aber wichtige Details). Ein erster Kontakt mit dem Bettleveling. Es scheint relativ einfach zu sein. Heute werde ich meinen ersten Druck versuchen und dann zurückkommen. Als Drucker sieht er sehr gut verarbeitet aus und besteht aus sehr guten Materialien. Alles ist an seinem Platz ohne Fehler.
Πρώτος εκτυπωτής! Πρώτη μέρα εχθές έγινε η συναρμολόγηση (σχετικά εύκολα, με την βοήθεια βίντεο από το Youtube για κάποιες μικρές αλλά σημαντικές λεπτομέρειες). Μία πρώτη επαφή με το Bed Leveling. Φαίνεται εύκολο σχετικά. Σήμερα θα δοκιμάσω την πρώτη μου εκτύπωση, και θα επιστρέψω. Σαν εκτυπωτής φαίνεται πολύ προσεγμένος με πολύ καλά υλικά. Όλα έχουν ακριβώς την θέση τους χωρίς καμία αστοχία.


Mein erster Drucker ist sehr gut, ich bin sehr zufrieden. Das Bett ist etwas lästig, es muss eingestellt werden, und die Lüfter beginnen seltsame Geräusche zu machen und müssen möglicherweise ausgetauscht werden. Aber insgesamt bin ich nach einem Jahr Nutzung ziemlich zufrieden. (Wenn jemand die Größe der zweiten Düse kennt und mir sagt, wäre ich sehr dankbar.)
πολυ καλος ειναι ο πρωτος μου εκτυπωτης ειμαι πολυ ευχαριστημενος
λιγο το bed του ειναι σπαστικο θελει να το ρυθμηζεις και τα fan του αρχηζουν να μου κανουν καποιους παραξενου θορυβου και ισως χρειαστουν αντικατασταση
αλλα γενικά μετα απο εναν χρονο χρησης ειμαι αρκετα ευχαριστημενος
(αν κανεις ξερει το δευτερο nozzle που εχει τι μεγεθος ειναι και μ πει θα ημουν πολυ ευχαριστημενος)
Einer der besten 3D-Drucker auf dem Markt. Sehr empfehlenswert!
Ένας από τούς καλύτερους 3d printer της αγοράς. Συνιστάται ανεπιφύλακτα!!!

Ausgezeichneter Drucker. Ich habe bereits einige Upgrades installiert, die ich sehr empfehle.
1 - CREALITY Ender CR Touch 2022 Upgrade Version - Automatischer Plattformnivellierungssensor
2 - SIMAX3D 5 Stück Düsen aus gehärtetem Stahl 0,4 mm
3 - Creality PEI-Platte PEI-Folie Ender 3 Official
4 - Gelber Heizbett-Federmatrixkopf-Feder 3D
Der Drucker allein ist wunderbar, aber mit den Upgrades erreicht er eine andere Ebene
Εξαιρετικός εκτυπωτής . Έχω ήδη τοποθετήσει και κάποια upgrades που τα προτείνω ανεπιφύλακτα.
1 - CREALITY Ender CR Touch 2022 Upgrade Version - Automatic Platform Leveling Sensor
2 - SIMAX3D 5pcs Nozzles Hardened Steel 0.4 mm
3 - Creality PEI Plate PEI Sheet Ender 3 Official
4 - Yellow heating bed feather matrix head spring 3D
Από μόνος του ο εκτυπωτής είναι θαυμάσιος άλλα με τα upgrades ανεβαίνει σε άλλο επίπεδο
Verifizierter Kauf
Erstes Mal in Kontakt mit einem 3D-Drucker.
Sehr gut.
Allerdings hatte ich viele Probleme mit der Nivellierung des Bettes. Ich muss definitiv die Federn wechseln und einen CR-Touch kaufen. Auch dann muss man genau auf den Z-Offset achten. Ein A4-Papier ist nicht dünn genug, um den Abstand zwischen der Düse und dem Bett zu messen.
Die Lösung besteht darin, den Offset beim Drucken eines großen Quadrats anzupassen (sagen wir diesem hier: https://www.thingiverse.com/thing:5183995). Sobald man den besten Druck sieht, speichert man ihn ab. Zuletzt kalibriert man die E-Schritte (sehr einfach und entscheidend). Nachdem man all dies getan hat, werden die Ergebnisse beeindruckend sein. Achte auf das Filament, das du verwenden wirst. Wenn es PLA ist, sollte es bei niedrigerer Temperatur leichter am Bett haften. PLA+ (ein viel besseres Material) ist schwieriger, mit höherer Temperatur und einer zusätzlichen Schicht in Cura, je nachdem, ob der Druck eine kleine Grundfläche hat, bist du bereit. Kein Bedarf an Klebstoff oder Haarspray. Diese sind für diejenigen, die keine ordnungsgemäße Bett-Nivellierung durchgeführt haben. Es ist nicht notwendig, auf eine Glasoberfläche umzusteigen. Es gibt unzählige Videos auf YouTube zu all diesen Themen, aber nicht alle sind zuverlässig, also führe wirklich die oben genannten Schritte durch und du wirst von dem Ergebnis schockiert sein. Es ist ein magisches Werkzeug. Allerdings ist es nicht Plug-and-Play. Man muss viel Zeit investieren und etwas extra Geld für den CR-Touch und die Federn ausgeben.
Πρώτη φορά σε επαφή με 3d printer.
Πάρα πολύ καλός.
Όμως με παίδεψε απίστευτα στο bed leveling. Οπωσδήποτε αλλαγή στα ελατήρια και αγορά cr-touch. Επίσης ακόμα και τότε προσέξτε πολύ το z-offset. Το χαρτί Α4 δεν είναι αρκετά λεπτό για να μετρήσετε την απόσταση της κεφαλής από το bed.
Η λύση είναι η ρύθμιση του offset ενώ τυπώνετε ένα μεγάλο τετράγωνο (ας πούμε αυτό https://www.thingiverse.com/thing:5183995). Μόλις δείτε την καλύτερη εκτύπωση το σώζετε εκει. Τελευταια ρύθμιση το καλιμπραρισμα των e-steps (Πανεύκολο και απείρως σημαντικό). Αφού τα κάνετε όλα αυτά, τα αποτελέσματα θα είναι εντυπωσιακά. Προσέξτε το φιλάμεντ που θα χρησιμοποιήσετε. Αν είναι PLA υποτίθεται κολλάει πιο εύκολα στο bed σε χαμηλότερη θερμοκρασία. Το PLA+ (πολύ καλύτερο υλικό) πιο δύσκολα, με πιο ανεβασμένη θερμοκρασία και με ένα έξτρα layer στο Cura ανάλογα την εκτύπωση αν έχει μικρό πάτημα, είστε μια χαρά. Δε χρειάζονται κόλλες και λακ. Αυτά είναι για αυτούς που δεν έκαναν σωστό bed leveling. Ούτε χρειάζεται να γυρίσεις το bed στη γυάλινη επιφάνεια. Για όλα αυτά υπάρχουν άπειρα video στο YouTube, αλλά όχι όλα αξιόπιστα , οπότε πραγματικά κάνετε τα παραπάνω και θα πάθετε σοκ με το αποτέλεσμα. Μαγικό εργαλείο. Δεν είναι όμως plug and play. Πρέπει να ασχοληθείτε αρκετά και να δώσετε κάποια λεφτά παραπάνω σε cr-touch και ελατήρια..
Ein ziemlich guter Drucker, aber für das Geld, das ich vor 10 Monaten bezahlt habe (299 Euro), hätte ich mir eine etwas bessere Qualität bei einigen Materialien gewünscht. Bei relativ wenigen Betriebsstunden (etwa 1 kg Filament) hatte er ein Problem mit zwei Lüftern, einem auf dem Motherboard und einem am Druckkopf. :(
Αρκετά καλός εκτυπωτής, αλλά για τα χρήματα που έδωσα πριν 10 μήνες (299 euro)
θα ήθελα λίγο καλύτερη ποιότητα σε κάποια υλικά.
Με σχετικά λίγες ώρες συνολικής λειτουργίας (περίπου 1 Kg filament), έβγαλε πρόβλημα σε δύο ανεμιστηράκια,
ένα στη μητρική και ένα στην κεφαλή εκτύπωσης. :(
Es ist mein erster Drucker und sein Geld wert, aber es gibt einige Dinge, die ihn zu einem geringen Preis viel besser machen könnten:
1) Gelbe Federn für die Nivellierung des Bettes sind absolut notwendig. Sie erschweren es dem Bett, sich zu bewegen, so dass keine Feinabstimmung nach jedem Druck erforderlich ist.
2) Wenn es um die Nivellierung des Bettes geht, ist die ManualMesh-Funktion der benutzerdefinierten Firmware von Jyers/Marlin sehr nützlich. Das Bett mag aus Glas sein, aber es gibt einige Unregelmäßigkeiten.
3) Füller mit spezifischen Größen sind sehr nützlich für die Nivellierung des Bettes.
4) Nach 2 Monaten Benutzung meines Druckers ist der Kunststoffextruder von Creality kaputt gegangen. Es gibt Metallextruder, die meiner Meinung nach ziemlich einfach auszutauschen sind.
5) Was den Lärm betrifft, sind die Motoren fast lautlos. Der gesamte Lärm kommt von den Lüftern, die leiser gemacht werden können, etwas, das ich noch nicht ausprobiert habe.
6) Eine der ersten Dinge, die ich gemacht habe, war die Installation von OctoPrint auf einem Raspberry Pi, was es mir ermöglicht, Drucke direkt von Cura aus zu senden und die volle Kontrolle über den Drucker zu haben.
Hinweis: Im Slicing-Programm (z.B. Cura) sollten Sie das Profil für den Ender 3 auswählen und nicht den Ender 3 Pro und die Abmessungen auf 220x220x250mm ändern.
Είναι ο πρώτος μου εκτυπωτής και για τα λεφτά του αξίζει, αλλά έχει και κάποια πράγματα που θα μπορούσαν να τον κάνουν πολύ καλύτερο με αρκετά χαμηλό κόστος:
1) Χρειάζεται οπωσδήποτε κίτρινα ελατήρια για το bed leveling. Κάνουν πολύ πιο δύσκολο το να κουνηθεί το bed έτσι ώστε να μην χρειάζεται fine tuning μετά από κάθε print.
2) Όσο μιλάμε για bed leveling, πολύ χρήσιμο είναι το ManualMesh από το custom firmware του Jyers/Marlin. Μπορεί να είναι γυάλινο το bed, αλλά υπάρχουν κάποιες ατέλειες.
3) Για το bed leveling πολύ χρήσιμο είναι το Φίλλερ που έχει πολύ συγκεκριμένα μεγέθη.
4) Μετά από 2 μήνες που χρησιμοποιώ τον εκτυπωτή μου έσπασε το πλαστικό extruder που έχει από την Creality. Υπάρχουν μεταλλικοί extruders που απ' ότι κατάλαβα η αλλαγή τους είναι αρκετά εύκολη.
5) Όσο για τον θόρυβο, τα moter δεν ακούγονται σχεδόν καθόλου. Όλος ο θόρυβος έρχεται από τα ανεμιστηράκια που υπάρχουν τρόποι να γίνουν πιο αθόρυβα, κάτι που δεν το έχω δοκιμάσει ακόμα.
6) Από τα πρώτα πράγματα που έκανα ήταν να εγκαταστήσω σε ένα Raspberry το OctoPrint με το οποίο μπορώ να στέλνω τις εκτυπώσεις κατευθείαν από το Cura και να έχω πλήρη έλεγχο του εκτυπωτή.
Προσοχή: Στο πρόγραμμα για slicing (πχ. Cura) θα πρέπει να επιλέξετε το profile για τον Ender 3 και όχι τον Ender 3 Pro και να αλλάξετε τις διαστάσεις σε 220x220x250mm.
Der Drucker ist für seine Preisklasse sehr gut. Die Montage ist ziemlich einfach. Es gibt eine große Gemeinschaft von Benutzern dieses Druckers, die bei Problemen helfen können, auf die Sie stoßen könnten. Nun kommen wir zu den negativen Punkten: Der Extruder und die Bett-Nivellierfedern müssen durch eine "gute Nacht" ersetzt werden. Dies verursacht zusätzliche Kosten von 20-30€. Außerdem wird empfohlen, das BLTouch-Upgrade zu erhalten, wenn Sie keine Probleme mit der manuellen Bett-Nivellierung haben möchten. In Griechenland kann es für 75€ gefunden werden, während es im Ausland für 45€ erhältlich ist. Als neuer Benutzer denken Sie vielleicht, dass Sie es nicht brauchen und dass Sie es manuell machen können, aber viele haben es versucht und nur wenige haben Erfolg gehabt. Also, wenn Sie diesen Drucker kaufen, denken Sie daran, dass es gut wäre, fast weitere 100€ für Upgrades einzuplanen. Ich bereue den Kauf nicht, ich warne nur vor einigen Schwächen, auf die Sie stoßen könnten.
Ο εκτυπωτης για τα λεφτα του στη κατηγορια του ειναι παρα πολυ καλος. Αρκετα ευκολη συναρμολογηση. Υπαρχει μεγαλο community χρηστων αυτου του εκτυπωτη που μπορει να βοηθησει σε θεματα που μπορει να αντιμετωπίσεις. Παμε τωρα στα αρνητικα: o extruder & τα ελατηρια του bed leveling θελουν αλλαγη με το "καλησπερα σας". Αυτο προσθετει ενα επιπλεον κοστος 20-30€. Επισης, αν δεν θες να φας τα νιατα σου να κανεις bed leveling χειροκινητα, προτεινεται να παρεις το upgrade BLTouch που στην Ελλαδα το βρισκεις στα 75€, ενω στο εξωτερικο μπορεις να το βρεις με 45€. Μπορει να νομιζεις και εσυ ως νεος χρηστης οτι δεν το χρειαζεσαι και οτι θα καταφερεις να το κανεις χειροκινητα αλλα πολλοι προσπαθησαν, λιγοι τα κατάφεραν. Οποτε οταν αγορασετε αυτον τον εκτυπωτη να εχετε υποψην οτι καλο θα ηταν να δωσετε σχεδον αλλα 100€ για αναβαθμισεις. Δεν μετανιωνω για την αγορα, απλα προειδοποιω για καποιες αδυναμιες που ισως συναντησετε.
Verifizierter Kauf
Sehr guter Drucker, für den Einstieg in das Gebiet und darüber hinaus.
Seriose Firma mit Unterstützung, wenn nötig...
Es gibt unendlich viel Material im Internet für jedes auftretende Problem oder Frage,
Es erfordert etwas Aufmerksamkeit während der Montage, um es richtig zu machen, und man muss das Bett-Nivellieren verstehen oder den Bl-Touch kaufen....
πολύ καλός εκτυπωτής, για εισαγωγή στον χώρο και όχι μόνο.
σοβαρή εταιρεία με support όταν χρειάστηκε ...
υπάρχει άπειρο υλικό στο Internet για ότι πρόβλημα προκύψει ή απορία,
θέλει λιγο προσοχή κατά την συναρμολόγηση του ώστε να γίνει σωστά, και θέλει να καταλάβεις το bed-leveling ή να αγοράσεις το bl-touch ....

Es ist mein erster 3D-Drucker, aber mit ein wenig Mühe habe ich sehr gute Ergebnisse erzielt. Das einzige Problem war die Druckoberfläche, da die Ausdrucke überhaupt nicht haften blieben. Ich musste die Glasseite verwenden.
Είναι ο πρώτος μου τρισδιάστατος εκτυπωτής αλλά με λίγη προσπάθεια έβγαλα πολύ καλά αποτελέσματα. Μόνο πρόβλημα η επιφάνια εκτύπωσης γιατί οι εκτυπώσεις δεν κόλλαγαν με τίποτα. Έπρεπε να χρησιμοποιήσω την γυάλινη πλευρά.
Kauf am 21.12.20, spielt neben einem Prusa Mini. Der Drucker ist ein Juwel, jeden Euro wert.
Ein kleines Minus für mich war das anfängliche Bettleveling, aber es wurde leicht auf dem Weg korrigiert.
Man kann es nicht leise nennen. Ich überlege, eine Modifikation für leise Lüfter durchzuführen, es hat viele und der Unterschied ist spürbar.
Wenn Sie an kabellosem Drucken interessiert sind, funktionieren Octo mit Pi4 oder Creality Wifi in meinem Fall sehr gut.
Kaufen Sie es mit geschlossenen Augen!
Αγορά 21/12/20, παίζει παράλληλα με έναν Prusa Mini. Ο εκτυπωτής είναι διαμάντι, αξίζει το κάθε του ευρώ.
Μικρό αρνητικό στην περίπτωση μου ήταν η αρχική ρύθμιση του bed (bed leveling), που όμως διορθώθηκε πολύ εύκολα στην πορεία.
Αθόρυβο δε τον λες. Σκέφτομαι να προχωρήσω σε mod για silent fans, έχει πολλά και η διαφορά είναι εμφανής.
Αν ενδιαφέρεστε για ασύρματη εκτύπωση, Octo με Pi4 ή Creality Wifi, και τα δύο παίζουν πολύ καλά στην περίπτωσή μου.
Αγοράστε τον με κλειστά μάτια!
Erstaunlich für die erste Begegnung mit 3D-Druck. Es wurde mir von einem Freund mit viel mehr Erfahrung empfohlen und die ersten Drucke sind sehr gut.
Καταπληκτικός για πρώτη επαφή με το 3d printing. Μου τον πρότεινε φίλος με σαφώς περισσότερη εμπειρία, και οι πρώτες εκτυπώσεις είναι πάρα πολύ καλές.
Ausgezeichneter Drucker!
Sehr einfacher Zusammenbau und unzählige Schritt-für-Schritt-Tutorial-Videos auf YouTube.
Die einzige Änderung, die meiner Meinung nach erforderlich ist, sind die Bettfedern.
Abgesehen davon kann er mit korrekter Bettjustierung unglaubliche Ergebnisse bereits beim ersten Druck liefern.
Nehmen Sie ihn mit geschlossenen Augen...
Εξαιρετικός εκτυπωτής!
Πολύ εύκολη συναρμολόγηση και άπειρα video στο youtube με βήμα προς βήμα tutorial .
Η μόνη αλλαγή που χρειάζεται κατά τη γνώμη μου είναι τα ελατήρια του bed .
Κατά τα άλλα με ένα καλό bed leveling μπορεί από την πρώτη κιόλας εκτύπωση να δώσει απίστευτο αποτέλεσμα .
Πάρτο με κλειστά μάτια ...
Einfache Einrichtung, stabile Konstruktion, ausgezeichneter Bildschirm (obwohl nicht berührungsempfindlich), makellose Druckoberfläche und ausgezeichnete Druckqualität für 300 Euro. Der einzige Nachteil, den ich bisher gefunden habe und der definitiv behoben wird, ist, dass es in Cura 4.7.1 und 4.8 Beta keine spezifischen Einstellungsprofile für den Ender 3 V2 gibt. Es funktioniert jedoch ohne Probleme mit dem Profil des Ender 3 Pro.
Εύκολο στήσιμο, στιβαρή κατασκευή, η οθόνη (αν και όχι αφής) εξαιρετική, η επιφάνεια εκτύπωσης αψόγη και η ποιότητα εκτύπωσης άριστη για τα 300 ευρώ. Το μόνο κακό που βρήκα μέχρι στιγμής που θα διορθωθεί κάποια στιγμή σίγουρα είναι πως στο Cura 4.7.1 και 4.8 Beta δεν υπάρχει ακόμα προφίλ ρυθμίεων συγκεκριμένα για τον Ender 3 V2, αλλά με το προφίλ του Ender 3 Pro δουλεύει χωρίς κανενα πρόβλημα.
Verifizierter Kauf
Zuverlässiger und preiswerter Kauf!
Αξιόπιστο και value for money αγορά !
Einfacher Zusammenbau, tolles Ergebnis für einen Anfänger. Schmiedebox ausgezeichnet.
Ευκολη συναρμολογηση, πολυ καλο αποτελεσμα για ενα αρχαριο. Forge Box Εξαιρετικο.
Verifizierter Kauf
Ein neues Spiel.
Ένα καινούργιο παιχνίδι.
Verifizierter Kauf
Hör auf zu suchen und nimm ihn einfach
Σταματήστε το ψάξιμο και πάρτε απλά αυτόν.-
Was auch immer am besten für jemanden ist, der sich aktiv in die Welt des 3D-Drucks einbringen möchte.
Ό,τι καλύτερο υπάρχει για κάποιον που θέλει να μπει ενεργά στον κόσμο του 3D printing.
Verifizierter Kauf
Verifizierter Kauf
Loipon san proto printer ist eine gute Wahl.
Der Aufbau ist relativ einfach, wenn deine Hände ein wenig geschickt sind und du schon einmal etwas in deinem Leben gesehen hast.
Seine kleinen Themen hat er hier und da, wenn du ihn 24/7 laufen hast und druckst (was natürlich sein sollte), aber es hilft dir dabei, den Drucker zu lernen und eine Vorstellung für den nächsten zu bekommen, den du kaufen wirst. Ich habe danach auf das P1S gewechselt.
Loipon san proto printer einai mia kalh arxh.
To xtisimo einai sxetika eukolo ean ta xeria sou pianoun ligo kai exeis vidosei kati sthn zwh sou.
ta thematakia tou ta exei pou kai pou otan to exeis anameno 24/7 kai ektiponeis (opos tha eprepe vevaia) alla se voithaei auto na matheis to printer kai na exeis mia gnosei gia to epomeno pou tha pareis. Egw meta apo ayto allaksa sto P1S.
Der Drucker funktioniert für seinen Preis sehr gut, das einzige Problem, das ich hatte, war das Nivellieren des Bettes. Für diejenigen, die ihn erwerben, achten Sie während der Montage darauf, dass sich die Räder ohne Druck drehen. Wenn sie sich nicht relativ leicht drehen, wird die Achse eine Neigung nach rechts oder links haben (meistens nach rechts). Das beste Upgrade, das ich nach 3 Monaten Nutzung gemacht habe, ist die Installation eines CR-Touch und Silikonpads anstelle von Federn. Es hilft wirklich sehr. Zusammenfassend kann ich ihn für eine Einführung in die Welt des 3D-Drucks sehr empfehlen.
Ο εκτυπωτής για τα χρήματα του δουλεύει πολύ καλά στο μόνο που με δυσκόλεψε είναι στο"ισιωμα" του κρεβατιού(bed levelling),όσοι τον αποκτήσετε δώστε μεγάλη σημασία κατά την συναρμολόγηση στα ροδακια να γυρίζουν χωρίς πίεση,αν δεν γυριζουν σχετικά άνετα θα έχει κλίση ο άξονας προς τα δεξια η αριστερά(κυρίως δεξιά),η καλύτερη αναβάθμιση που έκανα μετά από 3 μήνες χρήσης είναι η τοποθέτηση cr touch και σιλικονακια αντί για ελατήρια,πραγματικά βοηθάει πάρα πολύ,εν κατακλείδι για εισαγωγή στον χώρο του 3d printing προτείνετε με κλειστά μάτια.
Sehr gutes Produkt, etwas Lärm mit den Lüftern, aber insgesamt gute Ergebnisse.
Very good product, a bit of noise with the fans but overall good results.
Was den Drucker betrifft, habe ich nichts Schlechtes zu sagen. Hervorragende Druckqualität mit minimalen Problemen nach 2 Monaten häufiger Nutzung, die alle auf eine schlechte Ausrichtung der Basis zurückzuführen waren. Hervorragender Drucker für jemanden ohne vorherige Erfahrung auf diesem Gebiet
Όσο αναφορά τον εκτυπωτή δεν έχω κάτι κακό να πω. Άριστη ποιότητα εκτύπωσης με ελάχιστα προβληματα μετά από 2 και μήνες συχνής χρήστης, εκ των οποίων όλα οφείλονταν σε κακή ευθυγράμμιση της βάσης. Άριστος εκτυπωτής για κάποιον με μηδενική προηγούμενη εμπειρία στον τομέα
Guter Drucker, aber wenn Sie PETG drucken möchten, müssen Sie definitiv den Hot-End auf ein vollständig metallisches Modell aufrüsten, da sich das Teflon-Bowdenrohr sonst auflöst und giftige Gase freisetzt.
Καλος εκτυπωτης αλλα αμα θες να εκτυπωσεις petg θα χρειαστεις οπωσδηποτε αναβαθμιση του hot end σε all metal διοτι το τεφλον bowdern tube πυρολυεται με αποτελεσμα την εκφυσηση τοξικων αερίων.
244 Benutzer haben dieses Produkt und können Ihnen helfen
Fragen Sie nach dem Produkt
Τι διάσταση του filament θέλει;

Μέχρι 1.75! Μπορεί με μετατροπή να πάρει και 3.

πως μπορεις να φτιαξεις τα models;
Me fusion 360

τι υλικά μπορεί να εκτυπώσει? και αυτά που εκτυπώνει είναι στιβαρά?

Τυπώνει υλικά έως 260 βαθμούς χωρίς αναβάθμιση. Για εύκαμπτα θες μ8κροαναβαθμιση ή μεγάλη με αλλαγη σε direct Extruder. Εκεί μπορείς να ανέβεις και σε θερμοκρασίες με άλλο firmware.
Όσο για τα υλικά ακόμα και το pla+ είναι πολύ στιβαρό, αλλά παίζει ρόλο και το μοντέλο, ή πυκνότητα που τυπώνεις κλπ.
Για στιβαρότητα μην ανησυχείς καθόλου. Πάντως αν θες να ασχοληθεί; σοβαρά και δεν είσαι διατεθειμένος να κυνηγάς τις αναβαθμίσεις αν δεις ότι τις χρειάζεσαι πήγαινε στον S1 κατευθείαν.

Είμαι προ των θυρών να τον αγοράσω..απλά θέλω να ρωτήσω όσοι το έχετε.. μπορεί να εκτυπώσει σασί για σκαφακι η σασί για drone και γενικά για μοντέλα rc?? Ευχαριστώ πολύ
Ein DIY-3D-Drucker, der Ihnen die Möglichkeit gibt, ihn selbst zusammenzubauen und den gesamten Prozess von Anfang an ohne Einschränkungen zu erleben. Mit dem Ender 3 war 3D-Druck noch nie so erschwinglich, präzise und unterhaltsam.
Im Vergleich zum Ender 3 und Ender 3 Pro bietet das V2-Design den Benutzern ein sofort einsatzbereites Erlebnis und Upgrades, die auf Geräuschlosigkeit ausgerichtet sind (leisere 3D-Drucker).
Mit einem 4,3-Zoll-Farbdisplay und einer neu gestalteten Benutzeroberfläche, die Benutzerfreundlichkeit in den Vordergrund stellt, ist der Ender-3 V2 die ideale Wahl für Anfänger.
Die vorinstallierte Spannung des X- und Y-Riemens erleichtert es Ihnen, die Druckqualität Ihrer Maschine auf höchstem Niveau zu halten. Passen Sie die Riemenspannung einfach an, um eine präzise Leistung zu gewährleisten.
Es verfügt über eine eingebaute Schublade zur Aufbewahrung und einfachen Zugriff auf die wesentlichen Werkzeuge und Zubehörteile eines 3D-Druckers.
Spezifikationen werden von offiziellen Hersteller-Websites gesammelt. Bitte überprüfen Sie die Spezifikationen, bevor Sie Ihren endgültigen Kauf tätigen. Wenn Sie ein Problem bemerken, können Sie melden Sie es hier
Verifizierter Kauf
Loipon san proto printer ist eine gute Wahl.
Der Aufbau ist relativ einfach, wenn deine Hände ein wenig geschickt sind und du schon einmal etwas in deinem Leben gesehen hast.
Seine kleinen Themen hat er hier und da, wenn du ihn 24/7 laufen hast und druckst (was natürlich sein sollte), aber es hilft dir dabei, den Drucker zu lernen und eine Vorstellung für den nächsten zu bekommen, den du kaufen wirst. Ich habe danach auf das P1S gewechselt.
Loipon san proto printer einai mia kalh arxh.
To xtisimo einai sxetika eukolo ean ta xeria sou pianoun ligo kai exeis vidosei kati sthn zwh sou.
ta thematakia tou ta exei pou kai pou otan to exeis anameno 24/7 kai ektiponeis (opos tha eprepe vevaia) alla se voithaei auto na matheis to printer kai na exeis mia gnosei gia to epomeno pou tha pareis. Egw meta apo ayto allaksa sto P1S.
Der Drucker funktioniert für seinen Preis sehr gut, das einzige Problem, das ich hatte, war das Nivellieren des Bettes. Für diejenigen, die ihn erwerben, achten Sie während der Montage darauf, dass sich die Räder ohne Druck drehen. Wenn sie sich nicht relativ leicht drehen, wird die Achse eine Neigung nach rechts oder links haben (meistens nach rechts). Das beste Upgrade, das ich nach 3 Monaten Nutzung gemacht habe, ist die Installation eines CR-Touch und Silikonpads anstelle von Federn. Es hilft wirklich sehr. Zusammenfassend kann ich ihn für eine Einführung in die Welt des 3D-Drucks sehr empfehlen.
Ο εκτυπωτής για τα χρήματα του δουλεύει πολύ καλά στο μόνο που με δυσκόλεψε είναι στο"ισιωμα" του κρεβατιού(bed levelling),όσοι τον αποκτήσετε δώστε μεγάλη σημασία κατά την συναρμολόγηση στα ροδακια να γυρίζουν χωρίς πίεση,αν δεν γυριζουν σχετικά άνετα θα έχει κλίση ο άξονας προς τα δεξια η αριστερά(κυρίως δεξιά),η καλύτερη αναβάθμιση που έκανα μετά από 3 μήνες χρήσης είναι η τοποθέτηση cr touch και σιλικονακια αντί για ελατήρια,πραγματικά βοηθάει πάρα πολύ,εν κατακλείδι για εισαγωγή στον χώρο του 3d printing προτείνετε με κλειστά μάτια.
Sehr gutes Produkt, etwas Lärm mit den Lüftern, aber insgesamt gute Ergebnisse.
Very good product, a bit of noise with the fans but overall good results.
Was den Drucker betrifft, habe ich nichts Schlechtes zu sagen. Hervorragende Druckqualität mit minimalen Problemen nach 2 Monaten häufiger Nutzung, die alle auf eine schlechte Ausrichtung der Basis zurückzuführen waren. Hervorragender Drucker für jemanden ohne vorherige Erfahrung auf diesem Gebiet
Όσο αναφορά τον εκτυπωτή δεν έχω κάτι κακό να πω. Άριστη ποιότητα εκτύπωσης με ελάχιστα προβληματα μετά από 2 και μήνες συχνής χρήστης, εκ των οποίων όλα οφείλονταν σε κακή ευθυγράμμιση της βάσης. Άριστος εκτυπωτής για κάποιον με μηδενική προηγούμενη εμπειρία στον τομέα
Guter Drucker, aber wenn Sie PETG drucken möchten, müssen Sie definitiv den Hot-End auf ein vollständig metallisches Modell aufrüsten, da sich das Teflon-Bowdenrohr sonst auflöst und giftige Gase freisetzt.
Καλος εκτυπωτης αλλα αμα θες να εκτυπωσεις petg θα χρειαστεις οπωσδηποτε αναβαθμιση του hot end σε all metal διοτι το τεφλον bowdern tube πυρολυεται με αποτελεσμα την εκφυσηση τοξικων αερίων.
Ich werde schreiben, woran ich mich aus meinen Erfahrungen erinnere, um denen zu helfen, die darüber nachdenken, es als ihren ersten Drucker zu kaufen.
Ein paar Worte über meine Erfahrung:
Als ich es bekam, war ich ein absoluter Anfänger, ich hatte noch nie zuvor einen Drucker gesehen und hatte keine Ahnung, wie er funktionierte. Jetzt sind bereits ein halbes Jahr vergangen, seit ich ihn bekommen habe.
Seien wir ehrlich, egal welchen Drucker man bekommt (besonders zu so einem niedrigen Preis), es erfordert das Lesen (und viele Fehler), um zu verstehen, wie man ihn benutzt.
Zu Beginn habe ich viele Videos auf YouTube angesehen (auf Englisch, es gibt nicht viele auf Griechisch), um eine Vorstellung davon zu bekommen, wie ein 3D-Drucker im Allgemeinen funktioniert. Dann habe ich diesen Drucker ausgewählt und viele Montagevideos von verschiedenen Kanälen angesehen und festgestellt, dass es viele Leute gibt, die es "falsch" machen oder falsche Dinge sagen, also erfordert es Recherche.
Seien Sie vorsichtig mit den Rädern, drücken Sie sie nicht gegen die Kanten des Metalls, da sie Kratzer verursachen können und der Gummi nicht glatt ist, was zu Problemen führen kann.
Bei der Montage müssen Sie Zeit für die Räder aufwenden, damit keines von ihnen zu fest oder zu locker ist. Versuchen Sie, den gleichen Druck auf alle auf dem Metall auszuüben.
Was das Nivellieren des Bettes betrifft, habe ich natürlich viele Videos angesehen, um eine Vorstellung davon zu bekommen, was andere tun und den richtigen Weg zu finden, das Bett zu nivellieren und anhand des Drucks zu erkennen, ob es zu hoch oder zu niedrig positioniert ist.
Achtung: Wenn ein Druckvorgang abgeschlossen ist, VERSUCHEN SIE NICHT, ihn sofort zu entfernen. Sie müssen warten, bis das Bett auf etwa 30 Grad Celsius abgekühlt ist, um den Druck ohne Beeinträchtigung der Nivellierung des Bettes zu entfernen. Wenn die Betttemperatur über 40 Grad liegt, lässt sich der Druck nicht leicht entfernen. Es erfordert ein wenig Geduld und wird nach einer Weile leicht abgehen. Wenn Sie nicht warten, müssen Sie vor jedem Druck das Bett nivellieren. Es lohnt sich nicht.
Über die Software:
Nach einigen Drucken habe ich festgestellt, dass es bessere Softwareoptionen gibt, die aktueller sind und mehr Funktionen und Annehmlichkeiten bieten als die Standardsoftware, die mit dem Drucker geliefert wird. Zunächst habe ich Jyers ausprobiert, das ich etwa 4 Monate lang behalten habe. Es war definitiv besser als die Creality-Firmware, hatte aber einige Probleme, und der Entwickler hat sie selten aktualisiert.
Dann habe ich die Professional Firmware von mriscoc gefunden: https://github.com/mriscoc/Ender3V2S1, die definitiv die beste Option für diesen Drucker ist, obwohl es nicht viele Videos gibt, die sie erklären.
Um eine andere Firmware auf dem Drucker zu installieren, ist es relativ einfach und rückgängig zu machen (wenn Sie die Original-.bin-Datei von Creality finden können). Zunächst müssen Sie die Version Ihres Mainboards herausfinden, entweder 4.2.2 oder 4.2.7. Ich habe 4.2.2. Um herauszufinden, wie Sie dies überprüfen können, schauen Sie sich einige Videos an. Sobald Sie das wissen, laden Sie die entsprechende .bin-Datei von GitHub oder wo auch immer sie verfügbar ist, herunter. Legen Sie sie auf die SD-Karte, stecken Sie die SD-Karte in den Drucker und schalten Sie ihn dann ein. Nach einer Weile sehen Sie, dass er geflasht wird. Entfernen Sie dann die Karte und stecken Sie sie wieder in den PC.
Das war das Upgrade der Firmware des Druckers, aber es ist auch gut, die Firmware des Bildschirms zu aktualisieren, obwohl ich glaube, dass dies mehr für einige Symbole ist, die möglicherweise nicht angezeigt werden. Laden Sie also die Zip-Datei herunter: DWIN_SET für diese spezifische Firmware, entpacken Sie sie und werfen Sie den ORDNER weg (der die Dateien enthält) auf die SD-Karte (löschen Sie die vorherige .bin von der SD). Trennen Sie dann das Bildschirmkabel, entfernen Sie es vom Bildschirm, entfernen Sie die Schrauben von der Rückseite und entfernen Sie die Rückwand (es erfordert Kraft). Legen Sie die SD-Karte in den Bildschirm (es hat einen Steckplatz für SD), verbinden Sie den Bildschirm mit dem Kabel und schalten Sie den Drucker ein. Warten Sie, bis der Bildschirm lila wird, warten Sie etwa eine Minute und schalten Sie den Drucker aus. Entfernen Sie die Karte vom Bildschirm und löschen Sie die Dateien, dann sind Sie bereit. Schrauben Sie den Bildschirm wieder fest und setzen Sie ihn an seinen Platz.
Um zur standardmäßigen Creality-Firmware zurückzukehren, machen Sie theoretisch dasselbe, nur mit den Creality-Dateien, von denen ich keine Ahnung habe, wo ich sie finden kann, weil ich nicht zur Original-Firmware zurückkehren werde.
Außerdem muss die installierte Firmware speziell für Ihren Drucker sein. Das heißt, für den Ender 3 V2. Und mit Ihrer Version, 4.2.2 oder 4.2.7, je nachdem, welches Board Sie haben.
Mein Rat ist, zunächst mit der Original-Firmware zu arbeiten und dann eine andere zu installieren, wenn Ihnen diese gefällt.
Über Upgrades:
Ursprünglich hatte ich keine Upgrades gemacht, aber dann musste ich welche machen. Es ist sehr üblich, dass der Kunststoffgriff des Extruders nach einer Weile bricht. Ich habe das Bowden "Extruder Feed Kit MK8 Red - 1.75mm Aluminum" zusammen mit dem "Capricorn XS Series PTFE Bowden Tubing for 1.75mm Filament" installiert.
Achtung, beim Wechseln des Extruders oder der Bowden-Röhre müssen Sie eine E-Schritt-Kalibrierung und eine Durchflussraten-Kalibrierung durchführen. Dazu müssen Sie auf YouTube etwas suchen, aber es ist nicht so schwierig, nur einige Messungen und Berechnungen.
Kürzlich habe ich das Bett aufgerüstet und ein magnetisches Bett installiert, genauer gesagt eine generische "Textured Coated Flexible Steel Plate", sowie die magnetische Oberfläche, die Sie auf den Drucker kleben (meiner Meinung nach sollten Sie das Glas entfernen). Ich habe beides für 26 Euro in einem bekannten Geschäft in Athen gekauft.
Es ist für mich nicht so wichtig, dass es magnetisch ist. Im Wesentlichen wird damit geworben, dass es leicht zu entfernen und zu biegen ist, um den Druck abzulösen. Aber wenn Sie das tun, erfordert es Kraft und beeinträchtigt Ihre Bett-Nivellierung. Also entferne ich es nicht, ich habe es nur für eine bessere Haftung des Materials am Bett (ich habe einen großen Unterschied im Vergleich zum Glas gesehen, das ich oft sehr gut gereinigt habe, damit es haftet).
Verwenden Sie auch keine Klebstoffe, Sprays usw., um das Material am Bett haften zu lassen. Wenn Sie die richtigen Einstellungen und eine ordnungsgemäße Bett-Nivellierung haben, wird es gut haften. Ein Tipp ist, die Geschwindigkeit für die erste Schicht des Drucks im Slicer zu reduzieren. Ich habe sie auf 3 in Cura eingestellt. Und es lohnt sich, es langsam zu machen, weil es die wichtigste Schicht ist.
Schließlich habe ich die Federn unter dem Bett aufgerüstet, zusammen mit den Rädern, die Sie zur Bett-Nivellierung einstellen. Das ist definitiv das erste Upgrade, das man machen sollte. Ich habe diese hier bekommen: [Link zum Produkt].
Über den Slicer:
Ich benutze Cura. Der Slicer wandelt 3D-Dateien wie .stl, .obj usw. in .gcode um, damit der Drucker sie lesen kann. Er gibt Anweisungen, wohin der Drucker den Extruder bewegen wird, wie viel Material er extrudieren wird usw. Während die 3D-Dateien für sich allein vom Drucker nicht verstanden werden können.
Sie benötigen also Cura oder ein ähnliches Programm, und es erfordert auch viel Experimentieren und Lesen.
Über Modelle:
Die 3D-Modelle, die Sie in den Slicer eingeben, können entweder von Ihnen mit CAD-Programmen oder Blender, 3Ds Max usw. erstellt werden, oder Sie können fertige Modelle von Thingiverse, Thangs usw. herunterladen.
Negative des Druckers:
Er hat von sich aus kein Bltouch. Persönlich habe ich keines installiert, weil es mir etwas kompliziert erscheint, aber wenn es von Anfang an dabei wäre, würde es mich nicht stören.
Nach einer Weile müssen Sie den Extruder gegen einen Metall-Extruder aufrüsten, da der Kunststoff-Extruder wahrscheinlich unterwegs brechen wird.
Die Federn müssen, wie ich bereits erwähnt habe, eingestellt werden. Dadurch wird das Bett stabiler und verhindert, dass die Bett-Nivellierung leicht durcheinander gerät.
Update 05/23: Ich habe den BL Touch vor 5 Monaten installiert und er hat meine Probleme gelöst...
Update 09/23: Ich habe gerade den Ender 3 V3 SE (von der europäischen Seite von Creality) erhalten und er ist besser und zum gleichen Preis. Er ist etwa 4-mal schneller, hat aber auch eine bessere Druckqualität, selbst bei diesen Geschwindigkeiten... Und der V2 ist gut, ich werde ihn auf jeden Fall behalten, aber der V3 SE ist einfacher.
Θα γράψω ότι θυμάμαι από αυτά που αντιμετώπισα για να βοηθήσω όσους σκέφτονται να τον αγοράσουν ως πρώτο εκτυπωτή.
Λίγα λόγια για την εμπειρία μου:
Όταν τον πήρα ήμουν τελείως αρχάριος, δεν είχα ξαναδεί εκτυπωτή και δεν είχα ιδέα για το πως λειτουργεί. Τώρα έχεις περάσει μισός χρόνος από τότε που τον πήρα.
Κακά τα ψέματα, όποιον εκτυπωτή και να πάρεις (ειδικά με τόσα λίγα χρήματα) θέλει διάβασμα (και αρκετά λάθη) για να καταλάβεις πως να τον χρησιμοποιείς.
Εγώ αρχικά είδα πολλά βιντεάκια στο youtube (στα αγγλικά, δεν υπάρχουν πολλά στα ελληνικά) για να πάρω μια ιδέα για το πως λειτουργεί γενικά ένας 3D εκτυπωτής. Έπειτα, διάλεξα αυτόν τον εκτυπωτή και είδα πάρα πολλά βιντεάκια περί συναρμολόγησης, από πολλά διαφορετικά κανάλια, και συνειδητοποίησα ότι δεν είναι λίγοι αυτοί που το κάνουν "λάθος" ή λένε λάθος πράγματα, οπότε θέλει ψάξιμο.
Προσοχή στα ροδάκια, μη τα πιέσετε στις άκρες από τα σίδερα, επειδή χαράζονται και το λάστιχο μετά δεν είναι λείο και ίσως έχετε θέμα.
Όταν το συναρμολογήσετε, πρέπει να αφιερώσετε χρόνο στα ροδάκια έτσι ώστε να μην υπάρχει κάποιο ροδάκι που είναι πάρα πολύ σφιχτό, ή κάποιο που είναι πάρα πολύ χαλαρό. Όσο μπορείτε να έχουν την ίδια πίεση όλα πάνω στα σίδερα.
Όσο για το bed leveling, προφανώς και εκεί είδα πολλά βιντεάκια για να έχω μια ιδέα το τι κάνουν οι άλλοι και να βρω ποιος είναι ο πιο σωστός τρόπος να ισιώσεις το "κρεβάτι", και πως να αναγνωρίζεις από την εκτύπωση αν είναι τοποθετημένο πιο κάτω ή πιο πάνω απ'ότι πρέπει.
Προσοχή: όταν τελειώνει μια εκτύπωση, ΜΗΝ προσπαθείτε να την βγάλετε με το που σταματήσει. Πρέπει να περιμένετε μέχρι να κρυώσει το κρεβάτι κάπου στους 30 για να μπορείτε να αφαιρέσετε την εκτύπωση χωρίς να χαλάσετε το bed leveling. Όσο η θερμοκρασία του κρεβατιού είναι 40+, δεν ξεκολλάει εύκολα η εκτύπωση. Θέλει λίγο υπομονή και θα βγει πολύ εύκολα μετά από λίγο. Αν δε περιμένετε θα πρέπει κάθε φορά πριν την εκτύπωση να κάνετε bed leveling. Δεν αξίζει.
Περί λογισμικών:
Μετά από μερικές εκτυπώσεις, κατάλαβα ότι υπάρχουν κάποια καλύτερα λογισμικά, πιο ανανεωμένα, με περισσότερες λειτουργίες και ευκολίες από αυτό με το οποίο έρχεται ως default ο εκτυπωτής, και αρχικά δοκίμασα το Jyers, το οποίο το κράτησα για περίπου 4 μήνες. Ήταν σαφώς καλύτερο από το firmware της Creality όμως είχε κάποια θεματάκια, και ο developer δεν το ανανέωνε σχεδόν ποτέ.
Μετά βρήκα το Professional Firmware του mriscoc: https://github.com/mriscoc/Ender3V2S1 το οποίο είναι σίγουρα ότι καλύτερο υπάρχει για τον συγκεκριμένο εκτυπωτή, αν και δεν υπάρχουν πολλά βιντεάκια που να το εξηγούν.
Για να βάλεις ένα άλλο firmware στον εκτυπωτή, είναι σχετικά εύκολο, και αναστρέψιμο (αν μπορείς να βρεις το αρχικό .bin αρχείο της Creality). Αρχικά πρέπει να μάθεις ποια είναι η έκδοση της κύριας πλακέτας σου. Είτε 4.2.2 είτε 4.2.7. Εγώ έχω την 4.2.2. Για να δεις πως το βλέπουμε δες κάποια βιντεάκια. Αφού το δεις αυτό, κατεβάζεις το αντίστοιχο .bin αρχείο από το github ή οπουδήποτε αλλού το έχουν. Το βάζεις στην SD, βάζεις την SD στον εκτυπωτή και μετά τον ανοίγεις. Θα δεις ότι μετά από λίγο θα περαστεί. Μετά βγάζεις την κάρτα και την βάζεις πάλι στο PC.
Αυτό ήταν για να αναβαθμίσεις το firmware του εκτυπωτή, όμως καλό είναι να αναβαθμίσεις και το firmware της οθόνης, αν και αυτό νομίζω είναι πιο πολύ για κάποια εικονίδια που μπορεί να μην εμφανίζονται. Οπότε κατεβάζεις και το zip: DWIN_SET για τον συγκεκριμένο firmware, τον κάνεις unzip και πετάς τον ΦΑΚΕΛΟ (που περιέχει τα αρχεία) μέσα στην SD (διαγράφεις το προηγούμενο .bin από την SD). Μετά αποσυνδέεις το καλώδιο της οθόνης, βγάζεις στην οθόνη και αφαιρείς τις βίδες από πίσω της και βγάζεις το πίσω καπάκι της (θέλει δύναμη). Τοποθετείς την SD κάρτα μέσα στην οθόνη (έχει μια υποδοχή για SD), συνδέεις την οθόνη με το καλώδιο και ανοίγεις τον εκτυπωτή. Περιμένεις μέχρι η οθόνη να γίνει προτοκαλί, περιμένεις και κανένα λεπτό παραπάνω, και κλείνεις τον εκτυπωτή. Βγάλε την κάρτα απ την οθόνη και διέγραψε τα αρχεία και είσαι έτοιμος. Βίδωσε την οθόνη και βάλτη πάλι στη θέση της.
Για να γυρίσεις πίσω στο default firmware της Creality, θεωρητικά κάνεις ακριβώς το ίδιο, απλά με τα αρχεία της Creality, τα οποία δεν έχω ιδέα από που τα βρίσκεις επειδή δεν πρόκειται να περάσω ξανά το αρχικό firmware.
Επίσης για ότι firmware βάλετε, πρέπει υποχρεωτικά να είναι για τον συγκεκριμένο εκτυπωτή σας. Δηλαδή για Ender 3 V2. Και με την έκδοσή σας, 4.2.2 ή 4.2.7, εξαρτάται τι πλακέτα έχετε.
Η συμβουλή μου είναι να δουλέψετε πρώτα με το αρχικό firmware, και στη πορεία βάλτε άλλο αν σας αρέσει.
Περί αναβαθμίσεων:
Αρχικά εγώ δεν είχα κάνει καμία αναβάθμιση, όμως μετά χρειάστηκα.
Είναι πάρα πολύ συχνό φαινόμενο να σου σπάσει η πλαστική λαβή από το extruder μετά από λίγο.
Εγώ έβαλα τον Bowden "Extruder Feed Kit MK8 Red - 1.75mm Aluminum" μαζί με το "Capricorn XS Series PTFE Bowden Tubing for 1.75mm Filament".
Προσοχή, όταν αλλάζετε extruder ή bowden tube, πρέπει να κάνετε e-step calibration και flow rate calibration. Θέλει ψάξιμο στο youtube αλλά δεν είναι τόσο δύσκολο, απλά λίγο μέτρημα και κάτι υπολογισμούς.
Πρόσφατα αναβάμισα το κρεβάτι και έβαλα μαγνητικό, συγκεκριμένα ένα generic "Textured Coated Flexible Steel Plate", + τη μαγνητική επιφάνεια που κολλάς στον εκτυπωτή (πρέπει να αφαιρέσεις το γυαλί κατά τη γνώμη μου). Τα πήρα και τα δύο με 26 ευρώ από ένα γνωστό κατάστημα στην Αθήνα.
Δεν έχει σημασία τόσο για μένα που είναι μαγνητικό. Στην ουσία το διαφημίζουν ότι μπορείς εύκολα να το αφαιρέσεις και να το λυγίσεις για να ξεκολλήσει η εκτήπωση. Όμως όταν το κάνεις αυτό, θέλει δύναμη και σου χαλάει το bed leveling. Οπότε εγώ δε το βγάζω, και απλά το έχω για πολύ καλύτερη συγκόλληση του υλικού στο κρεβάτι (εγώ είδα μεγάλη διαφορά από το γυαλί, που συχνά καθάριζα πολύ καλά για να κολλάει).
Επίσης μη χρησιμοποιείτε κόλλες, σπρέι κλπ για να κολλήσει καλά το υλικό στο κρεβάτι. Αν έχεις σωστές ρυθμίσεις και σωστό bed leveling, θα κολλήσει μια χαρά. Ένα τιπ είναι να χαμηλώσετε στο slicer την ταχύτητα για το πρώτο layer της εκτύπωσης. Εγώ το έχω στο 3 στο Cura. Και αξίζει να το κάνει αργά, επειδή είναι το πιο σημαντικό layer.
Τέλος, αναβάθμισα τα ελατήρια κάτω από το κρεβάτι, μαζί με τις ροδέλες που κουνάς για το bed leveling. Είναι σίγουρα η πρώτη αναβάθμιση που θα πρέπει να κάνει κανείς. Αυτά πήρα: https://www.skroutz.gr/s/22529679/%CE%A0%CE%B1%CE%BE%CE%B9%CE%BC%CE%AC%CE%B4%CE%B9%CE%B1-Leveling-%CE%B3%CE%B9%CE%B1-Ender-3-%CE%9A%CE%B9%CF%84-HS1855.html
Περί Slicer:
Εγώ χρησιμοποιώ το Cura. Το slicer μετατρέπει 3D αρχεία τύπου .stl, obj κ.α. σε .gcode για να μπορεί να τα διαβάζει ο εκτυπωτής. Είναι οδηγίες για το που ο εκτυπωτής θα μετακινήσει τον extruder, πόσο υλικό θα βγάλει κλπ. Ενώ τα 3D αρχεία δε μπορεί φυσικά να τα καταλάβει από μόνος του.
Οπότε χρειάζεται το Cura ή ένα άλλο πρόγραμμα σαν κ αυτό, και χρειάζεται και αρκετό πειραματισμό και διάβασμα.
Περί μοντέλων:
Τα 3D μοντέλα που θα δώσετε στο slicer, μπορείτε είτε να τα δημιουργήσετε εσείς με CAD προγράμματα ή με Blender, 3Ds Max κλπ, είτε να κατεβάσετε έτοιμα από Thingiverse, Thangs κλπ.
Αρνητικά του εκτυπωτή:
Δεν έχει bltouch από μόνος του. Εγώ προσωπικά δεν έχω βάλει επειδή μου φαίνεται λίγο περίπλοκο, όμως αν το είχε από μόνος του δε θα με χαλούσε.
Χρειάζεται να αναβαθμίσεις τον extruder σε μεταλλικό μετά από λίγο, επειδή λογικά ο πλαστικός θα σου σπάσει στη πορεία.
Χρειάζονται αναβάμιση τα ελατήρια όπως είπα παραπάνω. Έτσι θα είναι πιο σταθερό το κρεβάτι και δε θα χαλάει το bed leveling τόσο εύκολα.
Update 05/23: Έχω βάλει BL touch εδώ και 5 μήνες και μου έλυσε τα χέρια...
Update 09/23: Μόλις παρέλαβα τον Ender 3 V3 SE (από το ευρωπαικό site της creality) και είναι καλύτερος και στα ίδια χρήματα. Είναι περίπου 4 φορές πιο γρήγορος, αλλά και έχει καλύτερη ποιότητα εκτυπώσεων, ακόμα και σε αυτές τις ταχύτητες... Και ο V2 καλός είναι, θα τον κρατήσω εννοείται, απλά ο V3 SE είναι πιο εύκολος.
Unser erster Drucker dieser Art. Mein 12,5 Jahre alter Sohn hat ihn gekauft und hatte überhaupt keine Schwierigkeiten beim Zusammenbau, da er seit 7 Jahren Robotik betreibt und daher darüber Bescheid weiß. Er hat nur einen Fehler gemacht und benötigte technischen Support. Sehr gute Wahl! Wir empfehlen ihn sehr.
Ο 1ος μας εκτυπωτής τέτοιου τύπου.
Τον αγόρασε ο γιος μου 12,5 χρονών, δεν δυσκολεύτηκε καθόλου στη συναρμολόγηση, έχει κάνει 7 χρόνια ρομποτική οπότε έχει γνώσεις πάνω σε αυτό. Έκανε μόνο ένα λάθος και χρειάστηκε τεχνική υποστήριξη. Πολύ καλή επιλογή! Τον συνιστούμε ανεπιφύλακτα.
Erster Drucker! Die Montage fand gestern am ersten Tag statt (relativ einfach, mit Hilfe von Videos von YouTube für einige kleine, aber wichtige Details). Ein erster Kontakt mit dem Bettleveling. Es scheint relativ einfach zu sein. Heute werde ich meinen ersten Druck versuchen und dann zurückkommen. Als Drucker sieht er sehr gut verarbeitet aus und besteht aus sehr guten Materialien. Alles ist an seinem Platz ohne Fehler.
Πρώτος εκτυπωτής! Πρώτη μέρα εχθές έγινε η συναρμολόγηση (σχετικά εύκολα, με την βοήθεια βίντεο από το Youtube για κάποιες μικρές αλλά σημαντικές λεπτομέρειες). Μία πρώτη επαφή με το Bed Leveling. Φαίνεται εύκολο σχετικά. Σήμερα θα δοκιμάσω την πρώτη μου εκτύπωση, και θα επιστρέψω. Σαν εκτυπωτής φαίνεται πολύ προσεγμένος με πολύ καλά υλικά. Όλα έχουν ακριβώς την θέση τους χωρίς καμία αστοχία.
Mein erster Drucker ist sehr gut, ich bin sehr zufrieden. Das Bett ist etwas lästig, es muss eingestellt werden, und die Lüfter beginnen seltsame Geräusche zu machen und müssen möglicherweise ausgetauscht werden. Aber insgesamt bin ich nach einem Jahr Nutzung ziemlich zufrieden. (Wenn jemand die Größe der zweiten Düse kennt und mir sagt, wäre ich sehr dankbar.)
πολυ καλος ειναι ο πρωτος μου εκτυπωτης ειμαι πολυ ευχαριστημενος
λιγο το bed του ειναι σπαστικο θελει να το ρυθμηζεις και τα fan του αρχηζουν να μου κανουν καποιους παραξενου θορυβου και ισως χρειαστουν αντικατασταση
αλλα γενικά μετα απο εναν χρονο χρησης ειμαι αρκετα ευχαριστημενος
(αν κανεις ξερει το δευτερο nozzle που εχει τι μεγεθος ειναι και μ πει θα ημουν πολυ ευχαριστημενος)
Einer der besten 3D-Drucker auf dem Markt. Sehr empfehlenswert!
Ένας από τούς καλύτερους 3d printer της αγοράς. Συνιστάται ανεπιφύλακτα!!!
Ausgezeichneter Drucker. Ich habe bereits einige Upgrades installiert, die ich sehr empfehle.
1 - CREALITY Ender CR Touch 2022 Upgrade Version - Automatischer Plattformnivellierungssensor
2 - SIMAX3D 5 Stück Düsen aus gehärtetem Stahl 0,4 mm
3 - Creality PEI-Platte PEI-Folie Ender 3 Official
4 - Gelber Heizbett-Federmatrixkopf-Feder 3D
Der Drucker allein ist wunderbar, aber mit den Upgrades erreicht er eine andere Ebene
Εξαιρετικός εκτυπωτής . Έχω ήδη τοποθετήσει και κάποια upgrades που τα προτείνω ανεπιφύλακτα.
1 - CREALITY Ender CR Touch 2022 Upgrade Version - Automatic Platform Leveling Sensor
2 - SIMAX3D 5pcs Nozzles Hardened Steel 0.4 mm
3 - Creality PEI Plate PEI Sheet Ender 3 Official
4 - Yellow heating bed feather matrix head spring 3D
Από μόνος του ο εκτυπωτής είναι θαυμάσιος άλλα με τα upgrades ανεβαίνει σε άλλο επίπεδο
Verifizierter Kauf
Erstes Mal in Kontakt mit einem 3D-Drucker.
Sehr gut.
Allerdings hatte ich viele Probleme mit der Nivellierung des Bettes. Ich muss definitiv die Federn wechseln und einen CR-Touch kaufen. Auch dann muss man genau auf den Z-Offset achten. Ein A4-Papier ist nicht dünn genug, um den Abstand zwischen der Düse und dem Bett zu messen.
Die Lösung besteht darin, den Offset beim Drucken eines großen Quadrats anzupassen (sagen wir diesem hier: https://www.thingiverse.com/thing:5183995). Sobald man den besten Druck sieht, speichert man ihn ab. Zuletzt kalibriert man die E-Schritte (sehr einfach und entscheidend). Nachdem man all dies getan hat, werden die Ergebnisse beeindruckend sein. Achte auf das Filament, das du verwenden wirst. Wenn es PLA ist, sollte es bei niedrigerer Temperatur leichter am Bett haften. PLA+ (ein viel besseres Material) ist schwieriger, mit höherer Temperatur und einer zusätzlichen Schicht in Cura, je nachdem, ob der Druck eine kleine Grundfläche hat, bist du bereit. Kein Bedarf an Klebstoff oder Haarspray. Diese sind für diejenigen, die keine ordnungsgemäße Bett-Nivellierung durchgeführt haben. Es ist nicht notwendig, auf eine Glasoberfläche umzusteigen. Es gibt unzählige Videos auf YouTube zu all diesen Themen, aber nicht alle sind zuverlässig, also führe wirklich die oben genannten Schritte durch und du wirst von dem Ergebnis schockiert sein. Es ist ein magisches Werkzeug. Allerdings ist es nicht Plug-and-Play. Man muss viel Zeit investieren und etwas extra Geld für den CR-Touch und die Federn ausgeben.
Πρώτη φορά σε επαφή με 3d printer.
Πάρα πολύ καλός.
Όμως με παίδεψε απίστευτα στο bed leveling. Οπωσδήποτε αλλαγή στα ελατήρια και αγορά cr-touch. Επίσης ακόμα και τότε προσέξτε πολύ το z-offset. Το χαρτί Α4 δεν είναι αρκετά λεπτό για να μετρήσετε την απόσταση της κεφαλής από το bed.
Η λύση είναι η ρύθμιση του offset ενώ τυπώνετε ένα μεγάλο τετράγωνο (ας πούμε αυτό https://www.thingiverse.com/thing:5183995). Μόλις δείτε την καλύτερη εκτύπωση το σώζετε εκει. Τελευταια ρύθμιση το καλιμπραρισμα των e-steps (Πανεύκολο και απείρως σημαντικό). Αφού τα κάνετε όλα αυτά, τα αποτελέσματα θα είναι εντυπωσιακά. Προσέξτε το φιλάμεντ που θα χρησιμοποιήσετε. Αν είναι PLA υποτίθεται κολλάει πιο εύκολα στο bed σε χαμηλότερη θερμοκρασία. Το PLA+ (πολύ καλύτερο υλικό) πιο δύσκολα, με πιο ανεβασμένη θερμοκρασία και με ένα έξτρα layer στο Cura ανάλογα την εκτύπωση αν έχει μικρό πάτημα, είστε μια χαρά. Δε χρειάζονται κόλλες και λακ. Αυτά είναι για αυτούς που δεν έκαναν σωστό bed leveling. Ούτε χρειάζεται να γυρίσεις το bed στη γυάλινη επιφάνεια. Για όλα αυτά υπάρχουν άπειρα video στο YouTube, αλλά όχι όλα αξιόπιστα , οπότε πραγματικά κάνετε τα παραπάνω και θα πάθετε σοκ με το αποτέλεσμα. Μαγικό εργαλείο. Δεν είναι όμως plug and play. Πρέπει να ασχοληθείτε αρκετά και να δώσετε κάποια λεφτά παραπάνω σε cr-touch και ελατήρια..
Ein ziemlich guter Drucker, aber für das Geld, das ich vor 10 Monaten bezahlt habe (299 Euro), hätte ich mir eine etwas bessere Qualität bei einigen Materialien gewünscht. Bei relativ wenigen Betriebsstunden (etwa 1 kg Filament) hatte er ein Problem mit zwei Lüftern, einem auf dem Motherboard und einem am Druckkopf. :(
Αρκετά καλός εκτυπωτής, αλλά για τα χρήματα που έδωσα πριν 10 μήνες (299 euro)
θα ήθελα λίγο καλύτερη ποιότητα σε κάποια υλικά.
Με σχετικά λίγες ώρες συνολικής λειτουργίας (περίπου 1 Kg filament), έβγαλε πρόβλημα σε δύο ανεμιστηράκια,
ένα στη μητρική και ένα στην κεφαλή εκτύπωσης. :(
Es ist mein erster Drucker und sein Geld wert, aber es gibt einige Dinge, die ihn zu einem geringen Preis viel besser machen könnten:
1) Gelbe Federn für die Nivellierung des Bettes sind absolut notwendig. Sie erschweren es dem Bett, sich zu bewegen, so dass keine Feinabstimmung nach jedem Druck erforderlich ist.
2) Wenn es um die Nivellierung des Bettes geht, ist die ManualMesh-Funktion der benutzerdefinierten Firmware von Jyers/Marlin sehr nützlich. Das Bett mag aus Glas sein, aber es gibt einige Unregelmäßigkeiten.
3) Füller mit spezifischen Größen sind sehr nützlich für die Nivellierung des Bettes.
4) Nach 2 Monaten Benutzung meines Druckers ist der Kunststoffextruder von Creality kaputt gegangen. Es gibt Metallextruder, die meiner Meinung nach ziemlich einfach auszutauschen sind.
5) Was den Lärm betrifft, sind die Motoren fast lautlos. Der gesamte Lärm kommt von den Lüftern, die leiser gemacht werden können, etwas, das ich noch nicht ausprobiert habe.
6) Eine der ersten Dinge, die ich gemacht habe, war die Installation von OctoPrint auf einem Raspberry Pi, was es mir ermöglicht, Drucke direkt von Cura aus zu senden und die volle Kontrolle über den Drucker zu haben.
Hinweis: Im Slicing-Programm (z.B. Cura) sollten Sie das Profil für den Ender 3 auswählen und nicht den Ender 3 Pro und die Abmessungen auf 220x220x250mm ändern.
Είναι ο πρώτος μου εκτυπωτής και για τα λεφτά του αξίζει, αλλά έχει και κάποια πράγματα που θα μπορούσαν να τον κάνουν πολύ καλύτερο με αρκετά χαμηλό κόστος:
1) Χρειάζεται οπωσδήποτε κίτρινα ελατήρια για το bed leveling. Κάνουν πολύ πιο δύσκολο το να κουνηθεί το bed έτσι ώστε να μην χρειάζεται fine tuning μετά από κάθε print.
2) Όσο μιλάμε για bed leveling, πολύ χρήσιμο είναι το ManualMesh από το custom firmware του Jyers/Marlin. Μπορεί να είναι γυάλινο το bed, αλλά υπάρχουν κάποιες ατέλειες.
3) Για το bed leveling πολύ χρήσιμο είναι το Φίλλερ που έχει πολύ συγκεκριμένα μεγέθη.
4) Μετά από 2 μήνες που χρησιμοποιώ τον εκτυπωτή μου έσπασε το πλαστικό extruder που έχει από την Creality. Υπάρχουν μεταλλικοί extruders που απ' ότι κατάλαβα η αλλαγή τους είναι αρκετά εύκολη.
5) Όσο για τον θόρυβο, τα moter δεν ακούγονται σχεδόν καθόλου. Όλος ο θόρυβος έρχεται από τα ανεμιστηράκια που υπάρχουν τρόποι να γίνουν πιο αθόρυβα, κάτι που δεν το έχω δοκιμάσει ακόμα.
6) Από τα πρώτα πράγματα που έκανα ήταν να εγκαταστήσω σε ένα Raspberry το OctoPrint με το οποίο μπορώ να στέλνω τις εκτυπώσεις κατευθείαν από το Cura και να έχω πλήρη έλεγχο του εκτυπωτή.
Προσοχή: Στο πρόγραμμα για slicing (πχ. Cura) θα πρέπει να επιλέξετε το profile για τον Ender 3 και όχι τον Ender 3 Pro και να αλλάξετε τις διαστάσεις σε 220x220x250mm.
Der Drucker ist für seine Preisklasse sehr gut. Die Montage ist ziemlich einfach. Es gibt eine große Gemeinschaft von Benutzern dieses Druckers, die bei Problemen helfen können, auf die Sie stoßen könnten. Nun kommen wir zu den negativen Punkten: Der Extruder und die Bett-Nivellierfedern müssen durch eine "gute Nacht" ersetzt werden. Dies verursacht zusätzliche Kosten von 20-30€. Außerdem wird empfohlen, das BLTouch-Upgrade zu erhalten, wenn Sie keine Probleme mit der manuellen Bett-Nivellierung haben möchten. In Griechenland kann es für 75€ gefunden werden, während es im Ausland für 45€ erhältlich ist. Als neuer Benutzer denken Sie vielleicht, dass Sie es nicht brauchen und dass Sie es manuell machen können, aber viele haben es versucht und nur wenige haben Erfolg gehabt. Also, wenn Sie diesen Drucker kaufen, denken Sie daran, dass es gut wäre, fast weitere 100€ für Upgrades einzuplanen. Ich bereue den Kauf nicht, ich warne nur vor einigen Schwächen, auf die Sie stoßen könnten.
Ο εκτυπωτης για τα λεφτα του στη κατηγορια του ειναι παρα πολυ καλος. Αρκετα ευκολη συναρμολογηση. Υπαρχει μεγαλο community χρηστων αυτου του εκτυπωτη που μπορει να βοηθησει σε θεματα που μπορει να αντιμετωπίσεις. Παμε τωρα στα αρνητικα: o extruder & τα ελατηρια του bed leveling θελουν αλλαγη με το "καλησπερα σας". Αυτο προσθετει ενα επιπλεον κοστος 20-30€. Επισης, αν δεν θες να φας τα νιατα σου να κανεις bed leveling χειροκινητα, προτεινεται να παρεις το upgrade BLTouch που στην Ελλαδα το βρισκεις στα 75€, ενω στο εξωτερικο μπορεις να το βρεις με 45€. Μπορει να νομιζεις και εσυ ως νεος χρηστης οτι δεν το χρειαζεσαι και οτι θα καταφερεις να το κανεις χειροκινητα αλλα πολλοι προσπαθησαν, λιγοι τα κατάφεραν. Οποτε οταν αγορασετε αυτον τον εκτυπωτη να εχετε υποψην οτι καλο θα ηταν να δωσετε σχεδον αλλα 100€ για αναβαθμισεις. Δεν μετανιωνω για την αγορα, απλα προειδοποιω για καποιες αδυναμιες που ισως συναντησετε.
Verifizierter Kauf
Sehr guter Drucker, für den Einstieg in das Gebiet und darüber hinaus.
Seriose Firma mit Unterstützung, wenn nötig...
Es gibt unendlich viel Material im Internet für jedes auftretende Problem oder Frage,
Es erfordert etwas Aufmerksamkeit während der Montage, um es richtig zu machen, und man muss das Bett-Nivellieren verstehen oder den Bl-Touch kaufen....
πολύ καλός εκτυπωτής, για εισαγωγή στον χώρο και όχι μόνο.
σοβαρή εταιρεία με support όταν χρειάστηκε ...
υπάρχει άπειρο υλικό στο Internet για ότι πρόβλημα προκύψει ή απορία,
θέλει λιγο προσοχή κατά την συναρμολόγηση του ώστε να γίνει σωστά, και θέλει να καταλάβεις το bed-leveling ή να αγοράσεις το bl-touch ....
Es ist mein erster 3D-Drucker, aber mit ein wenig Mühe habe ich sehr gute Ergebnisse erzielt. Das einzige Problem war die Druckoberfläche, da die Ausdrucke überhaupt nicht haften blieben. Ich musste die Glasseite verwenden.
Είναι ο πρώτος μου τρισδιάστατος εκτυπωτής αλλά με λίγη προσπάθεια έβγαλα πολύ καλά αποτελέσματα. Μόνο πρόβλημα η επιφάνια εκτύπωσης γιατί οι εκτυπώσεις δεν κόλλαγαν με τίποτα. Έπρεπε να χρησιμοποιήσω την γυάλινη πλευρά.
Kauf am 21.12.20, spielt neben einem Prusa Mini. Der Drucker ist ein Juwel, jeden Euro wert.
Ein kleines Minus für mich war das anfängliche Bettleveling, aber es wurde leicht auf dem Weg korrigiert.
Man kann es nicht leise nennen. Ich überlege, eine Modifikation für leise Lüfter durchzuführen, es hat viele und der Unterschied ist spürbar.
Wenn Sie an kabellosem Drucken interessiert sind, funktionieren Octo mit Pi4 oder Creality Wifi in meinem Fall sehr gut.
Kaufen Sie es mit geschlossenen Augen!
Αγορά 21/12/20, παίζει παράλληλα με έναν Prusa Mini. Ο εκτυπωτής είναι διαμάντι, αξίζει το κάθε του ευρώ.
Μικρό αρνητικό στην περίπτωση μου ήταν η αρχική ρύθμιση του bed (bed leveling), που όμως διορθώθηκε πολύ εύκολα στην πορεία.
Αθόρυβο δε τον λες. Σκέφτομαι να προχωρήσω σε mod για silent fans, έχει πολλά και η διαφορά είναι εμφανής.
Αν ενδιαφέρεστε για ασύρματη εκτύπωση, Octo με Pi4 ή Creality Wifi, και τα δύο παίζουν πολύ καλά στην περίπτωσή μου.
Αγοράστε τον με κλειστά μάτια!
Erstaunlich für die erste Begegnung mit 3D-Druck. Es wurde mir von einem Freund mit viel mehr Erfahrung empfohlen und die ersten Drucke sind sehr gut.
Καταπληκτικός για πρώτη επαφή με το 3d printing. Μου τον πρότεινε φίλος με σαφώς περισσότερη εμπειρία, και οι πρώτες εκτυπώσεις είναι πάρα πολύ καλές.
Ausgezeichneter Drucker!
Sehr einfacher Zusammenbau und unzählige Schritt-für-Schritt-Tutorial-Videos auf YouTube.
Die einzige Änderung, die meiner Meinung nach erforderlich ist, sind die Bettfedern.
Abgesehen davon kann er mit korrekter Bettjustierung unglaubliche Ergebnisse bereits beim ersten Druck liefern.
Nehmen Sie ihn mit geschlossenen Augen...
Εξαιρετικός εκτυπωτής!
Πολύ εύκολη συναρμολόγηση και άπειρα video στο youtube με βήμα προς βήμα tutorial .
Η μόνη αλλαγή που χρειάζεται κατά τη γνώμη μου είναι τα ελατήρια του bed .
Κατά τα άλλα με ένα καλό bed leveling μπορεί από την πρώτη κιόλας εκτύπωση να δώσει απίστευτο αποτέλεσμα .
Πάρτο με κλειστά μάτια ...
Einfache Einrichtung, stabile Konstruktion, ausgezeichneter Bildschirm (obwohl nicht berührungsempfindlich), makellose Druckoberfläche und ausgezeichnete Druckqualität für 300 Euro. Der einzige Nachteil, den ich bisher gefunden habe und der definitiv behoben wird, ist, dass es in Cura 4.7.1 und 4.8 Beta keine spezifischen Einstellungsprofile für den Ender 3 V2 gibt. Es funktioniert jedoch ohne Probleme mit dem Profil des Ender 3 Pro.
Εύκολο στήσιμο, στιβαρή κατασκευή, η οθόνη (αν και όχι αφής) εξαιρετική, η επιφάνεια εκτύπωσης αψόγη και η ποιότητα εκτύπωσης άριστη για τα 300 ευρώ. Το μόνο κακό που βρήκα μέχρι στιγμής που θα διορθωθεί κάποια στιγμή σίγουρα είναι πως στο Cura 4.7.1 και 4.8 Beta δεν υπάρχει ακόμα προφίλ ρυθμίεων συγκεκριμένα για τον Ender 3 V2, αλλά με το προφίλ του Ender 3 Pro δουλεύει χωρίς κανενα πρόβλημα.
Verifizierter Kauf
Zuverlässiger und preiswerter Kauf!
Αξιόπιστο και value for money αγορά !
Einfacher Zusammenbau, tolles Ergebnis für einen Anfänger. Schmiedebox ausgezeichnet.
Ευκολη συναρμολογηση, πολυ καλο αποτελεσμα για ενα αρχαριο. Forge Box Εξαιρετικο.
Verifizierter Kauf
Ein neues Spiel.
Ένα καινούργιο παιχνίδι.
Verifizierter Kauf
Hör auf zu suchen und nimm ihn einfach
Σταματήστε το ψάξιμο και πάρτε απλά αυτόν.-
Was auch immer am besten für jemanden ist, der sich aktiv in die Welt des 3D-Drucks einbringen möchte.
Ό,τι καλύτερο υπάρχει για κάποιον που θέλει να μπει ενεργά στον κόσμο του 3D printing.
Verifizierter Kauf
Verifizierter Kauf
Loipon san proto printer ist eine gute Wahl.
Der Aufbau ist relativ einfach, wenn deine Hände ein wenig geschickt sind und du schon einmal etwas in deinem Leben gesehen hast.
Seine kleinen Themen hat er hier und da, wenn du ihn 24/7 laufen hast und druckst (was natürlich sein sollte), aber es hilft dir dabei, den Drucker zu lernen und eine Vorstellung für den nächsten zu bekommen, den du kaufen wirst. Ich habe danach auf das P1S gewechselt.
Loipon san proto printer einai mia kalh arxh.
To xtisimo einai sxetika eukolo ean ta xeria sou pianoun ligo kai exeis vidosei kati sthn zwh sou.
ta thematakia tou ta exei pou kai pou otan to exeis anameno 24/7 kai ektiponeis (opos tha eprepe vevaia) alla se voithaei auto na matheis to printer kai na exeis mia gnosei gia to epomeno pou tha pareis. Egw meta apo ayto allaksa sto P1S.
Der Drucker funktioniert für seinen Preis sehr gut, das einzige Problem, das ich hatte, war das Nivellieren des Bettes. Für diejenigen, die ihn erwerben, achten Sie während der Montage darauf, dass sich die Räder ohne Druck drehen. Wenn sie sich nicht relativ leicht drehen, wird die Achse eine Neigung nach rechts oder links haben (meistens nach rechts). Das beste Upgrade, das ich nach 3 Monaten Nutzung gemacht habe, ist die Installation eines CR-Touch und Silikonpads anstelle von Federn. Es hilft wirklich sehr. Zusammenfassend kann ich ihn für eine Einführung in die Welt des 3D-Drucks sehr empfehlen.
Ο εκτυπωτής για τα χρήματα του δουλεύει πολύ καλά στο μόνο που με δυσκόλεψε είναι στο"ισιωμα" του κρεβατιού(bed levelling),όσοι τον αποκτήσετε δώστε μεγάλη σημασία κατά την συναρμολόγηση στα ροδακια να γυρίζουν χωρίς πίεση,αν δεν γυριζουν σχετικά άνετα θα έχει κλίση ο άξονας προς τα δεξια η αριστερά(κυρίως δεξιά),η καλύτερη αναβάθμιση που έκανα μετά από 3 μήνες χρήσης είναι η τοποθέτηση cr touch και σιλικονακια αντί για ελατήρια,πραγματικά βοηθάει πάρα πολύ,εν κατακλείδι για εισαγωγή στον χώρο του 3d printing προτείνετε με κλειστά μάτια.
Sehr gutes Produkt, etwas Lärm mit den Lüftern, aber insgesamt gute Ergebnisse.
Very good product, a bit of noise with the fans but overall good results.
Was den Drucker betrifft, habe ich nichts Schlechtes zu sagen. Hervorragende Druckqualität mit minimalen Problemen nach 2 Monaten häufiger Nutzung, die alle auf eine schlechte Ausrichtung der Basis zurückzuführen waren. Hervorragender Drucker für jemanden ohne vorherige Erfahrung auf diesem Gebiet
Όσο αναφορά τον εκτυπωτή δεν έχω κάτι κακό να πω. Άριστη ποιότητα εκτύπωσης με ελάχιστα προβληματα μετά από 2 και μήνες συχνής χρήστης, εκ των οποίων όλα οφείλονταν σε κακή ευθυγράμμιση της βάσης. Άριστος εκτυπωτής για κάποιον με μηδενική προηγούμενη εμπειρία στον τομέα
Guter Drucker, aber wenn Sie PETG drucken möchten, müssen Sie definitiv den Hot-End auf ein vollständig metallisches Modell aufrüsten, da sich das Teflon-Bowdenrohr sonst auflöst und giftige Gase freisetzt.
Καλος εκτυπωτης αλλα αμα θες να εκτυπωσεις petg θα χρειαστεις οπωσδηποτε αναβαθμιση του hot end σε all metal διοτι το τεφλον bowdern tube πυρολυεται με αποτελεσμα την εκφυσηση τοξικων αερίων.

Ihr Bericht hilft uns, Maßnahmen zu ergreifen, indem wir die Probleme verstehen, mit denen unsere Nutzer bei verschiedenen Arten von Inhalten konfrontiert sind
Sei der Erste, der einen Kommentar hinterlässt!